
'%3e%3cpath%20d='M9%2021H15'%20stroke='black'%20stroke-width='2'%20stroke-linecap='round'%20stroke-linejoin='round'/%3e%3cpath%20d='M5.25001%209.75C5.25001%207.95979%205.96116%206.2429%207.22703%204.97703C8.4929%203.71116%2010.2098%203%2012%203C13.7902%203%2015.5071%203.71116%2016.773%204.97703C18.0388%206.2429%2018.75%207.95979%2018.75%209.75C18.75%2013.1081%2019.5281%2015.8063%2020.1469%2016.875C20.2126%2016.9888%2020.2472%2017.1179%2020.2474%2017.2493C20.2475%2017.3808%2020.2131%2017.5099%2020.1475%2017.6239C20.082%2017.7378%2019.9877%2017.8325%2019.8741%2017.8985C19.7604%2017.9645%2019.6314%2017.9995%2019.5%2018H4.50001C4.36874%2017.9992%204.23997%2017.964%204.12659%2017.8978C4.0132%2017.8317%203.91916%2017.7369%203.85387%2017.6231C3.78858%2017.5092%203.75432%2017.3801%203.75452%2017.2489C3.75472%2017.1176%203.78937%2016.9887%203.85501%2016.875C4.47282%2015.8063%205.25001%2013.1072%205.25001%209.75Z'%20stroke='black'%20stroke-width='2'%20stroke-linecap='round'%20stroke-linejoin='round'/%3e%3c/g%3e%3cdefs%3e%3cclipPath%20id='clip0_4762_133'%3e%3crect%20width='24'%20height='24'%20fill='white'/%3e%3c/clipPath%3e%3c/defs%3e%3c/svg%3e)
'%3e%3cpath%20d='M24%200H0V24H24V0Z'%20fill='white'%20fill-opacity='0.01'/%3e%3cpath%20d='M12%2011C14.2091%2011%2016%209.20914%2016%207C16%204.79086%2014.2091%203%2012%203C9.79086%203%208%204.79086%208%207C8%209.20914%209.79086%2011%2012%2011Z'%20stroke='black'%20stroke-width='2'%20stroke-linecap='round'%20stroke-linejoin='round'/%3e%3cpath%20d='M4%2021V20.4857C4%2018.5655%204%2017.6055%204.38753%2016.872C4.72841%2016.2269%205.27235%2015.7024%205.94138%2015.3737C6.70196%2015%207.6976%2015%209.68889%2015H14.3111C16.3024%2015%2017.298%2015%2018.0586%2015.3737C18.7276%2015.7024%2019.2716%2016.2269%2019.6125%2016.872C20%2017.6055%2020%2018.5655%2020%2020.4857V21'%20stroke='black'%20stroke-width='2'%20stroke-linecap='round'%20stroke-linejoin='round'/%3e%3c/g%3e%3cdefs%3e%3cclipPath%20id='clip0_4762_139'%3e%3crect%20width='24'%20height='24'%20fill='white'/%3e%3c/clipPath%3e%3c/defs%3e%3c/svg%3e)

Coco-AI 集成语雀作为语料库进行检索
忘机山人
发布于340天前博客图片修整中,看不了可以先搜索公众号“忘机山人”看。
说在前面,这个功能需要在语雀后台申请 Personal Access Token。使用的需要超级会员的(不是邀请新用户给的专业会员),所以需要付费使用。
https://appstore.lazycat.cloud/#/shop/detail/xu.deploy.coco-ai
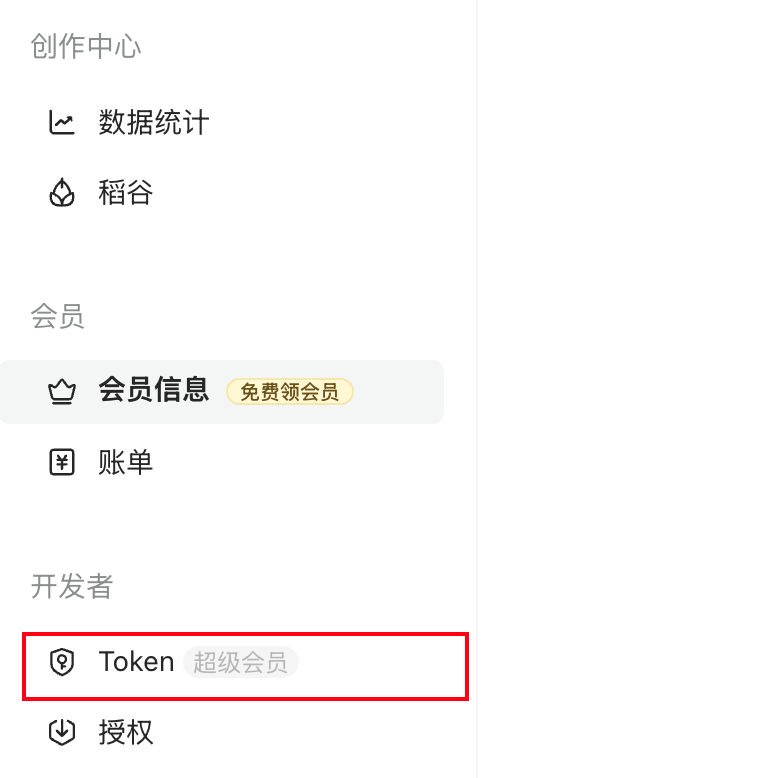
然后在语雀后台,也就是https://www.yuque.com/settings/tokens处可以看见申请token的地方,如果你没有超级会员,这个是没办法用的。
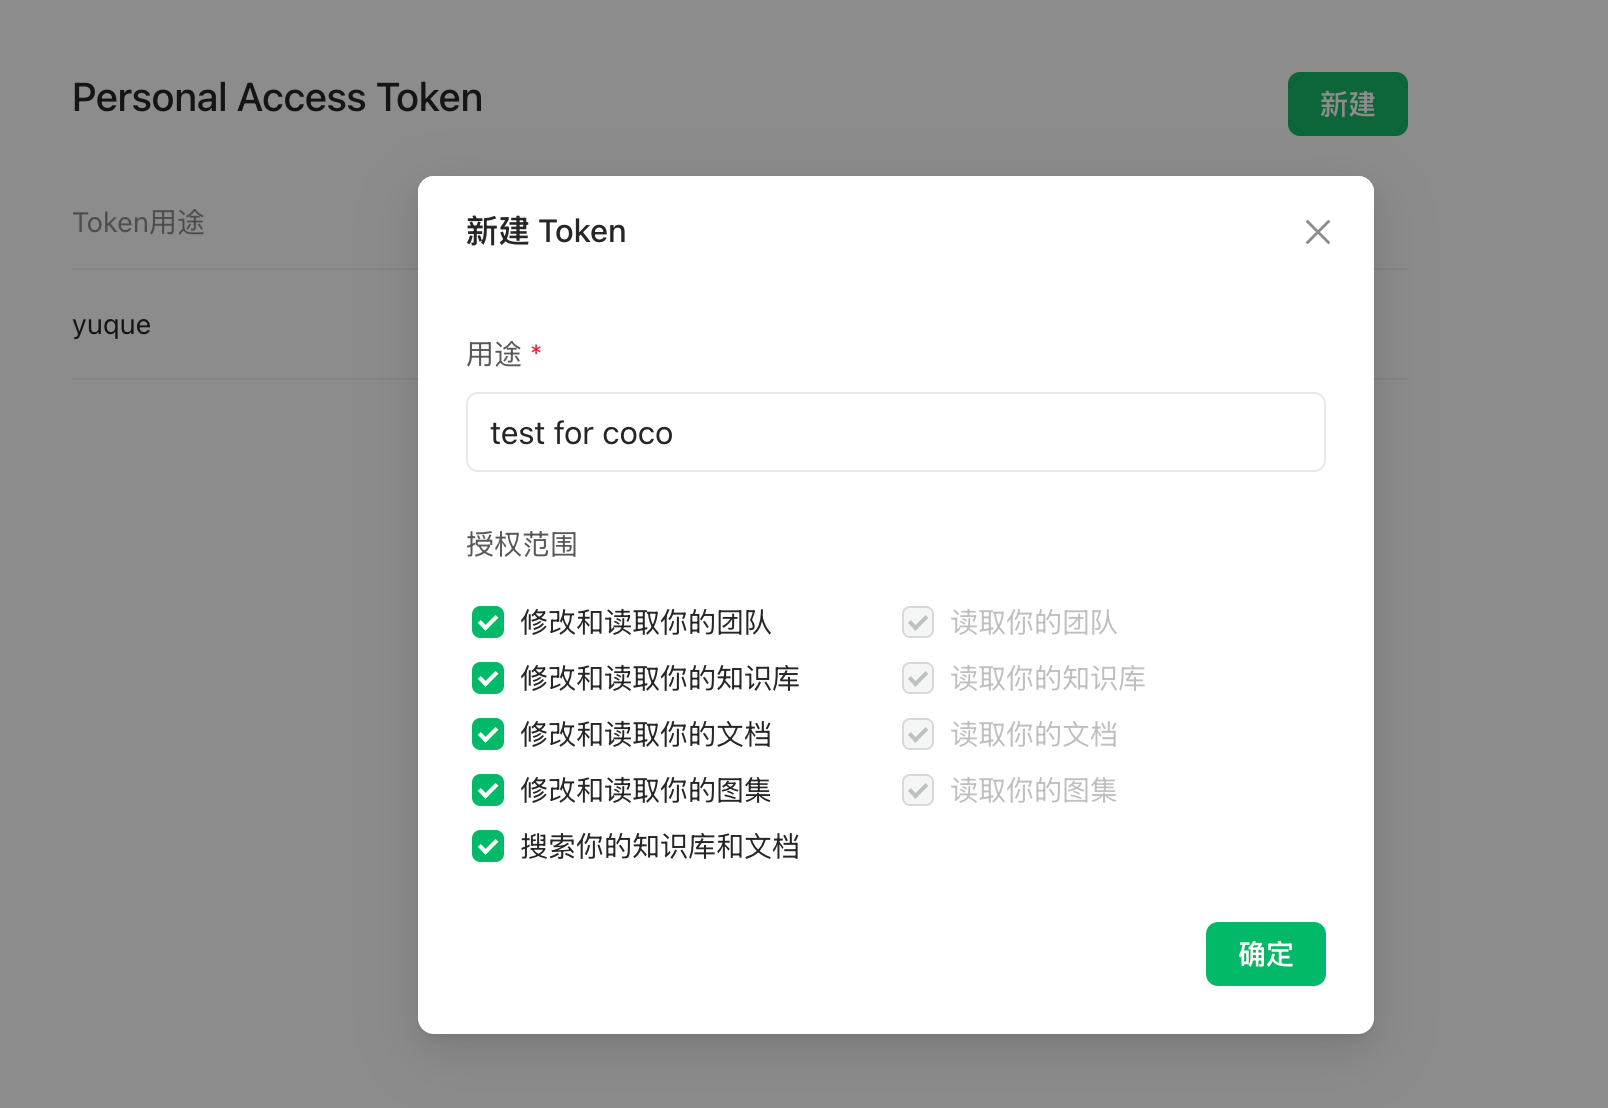
点击新建,创建 token 分发权限,我这边给了所以的权限,语雀和 Notion 不同,这里给了权限就够了,其他地方无需在给权限。(手动@Notion 还要在文档或者文件夹授权)
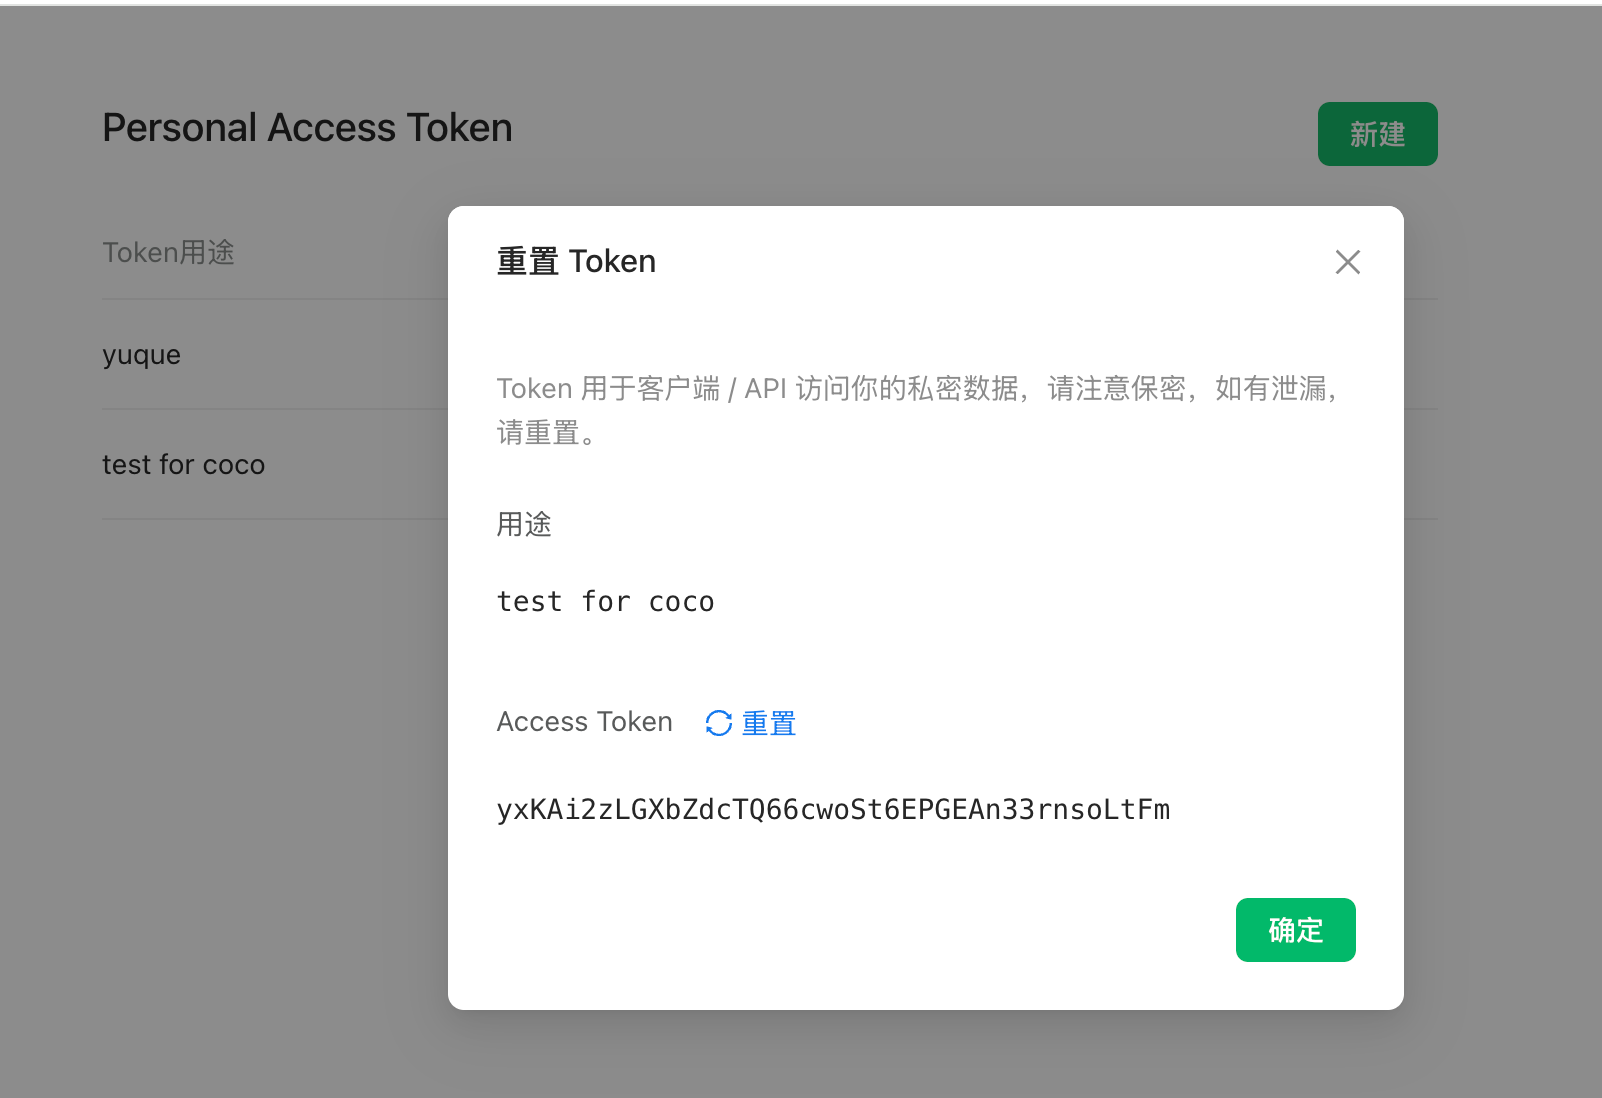
点击查看详情可以看到 token,这里的 token 是可以反复查看的,由此语雀这一侧的设置完毕。
回到 coco-AI,我这边使用的是这个镜像,这里添加了对个人版本语雀的支持。
infinilabs/coco:0.3.2_NIGHTLY-20250417
启动命令如下:
docker run -d --name cocoserver -p 9000:9000 infinilabs/coco:0.3.2_NIGHTLY-20250417
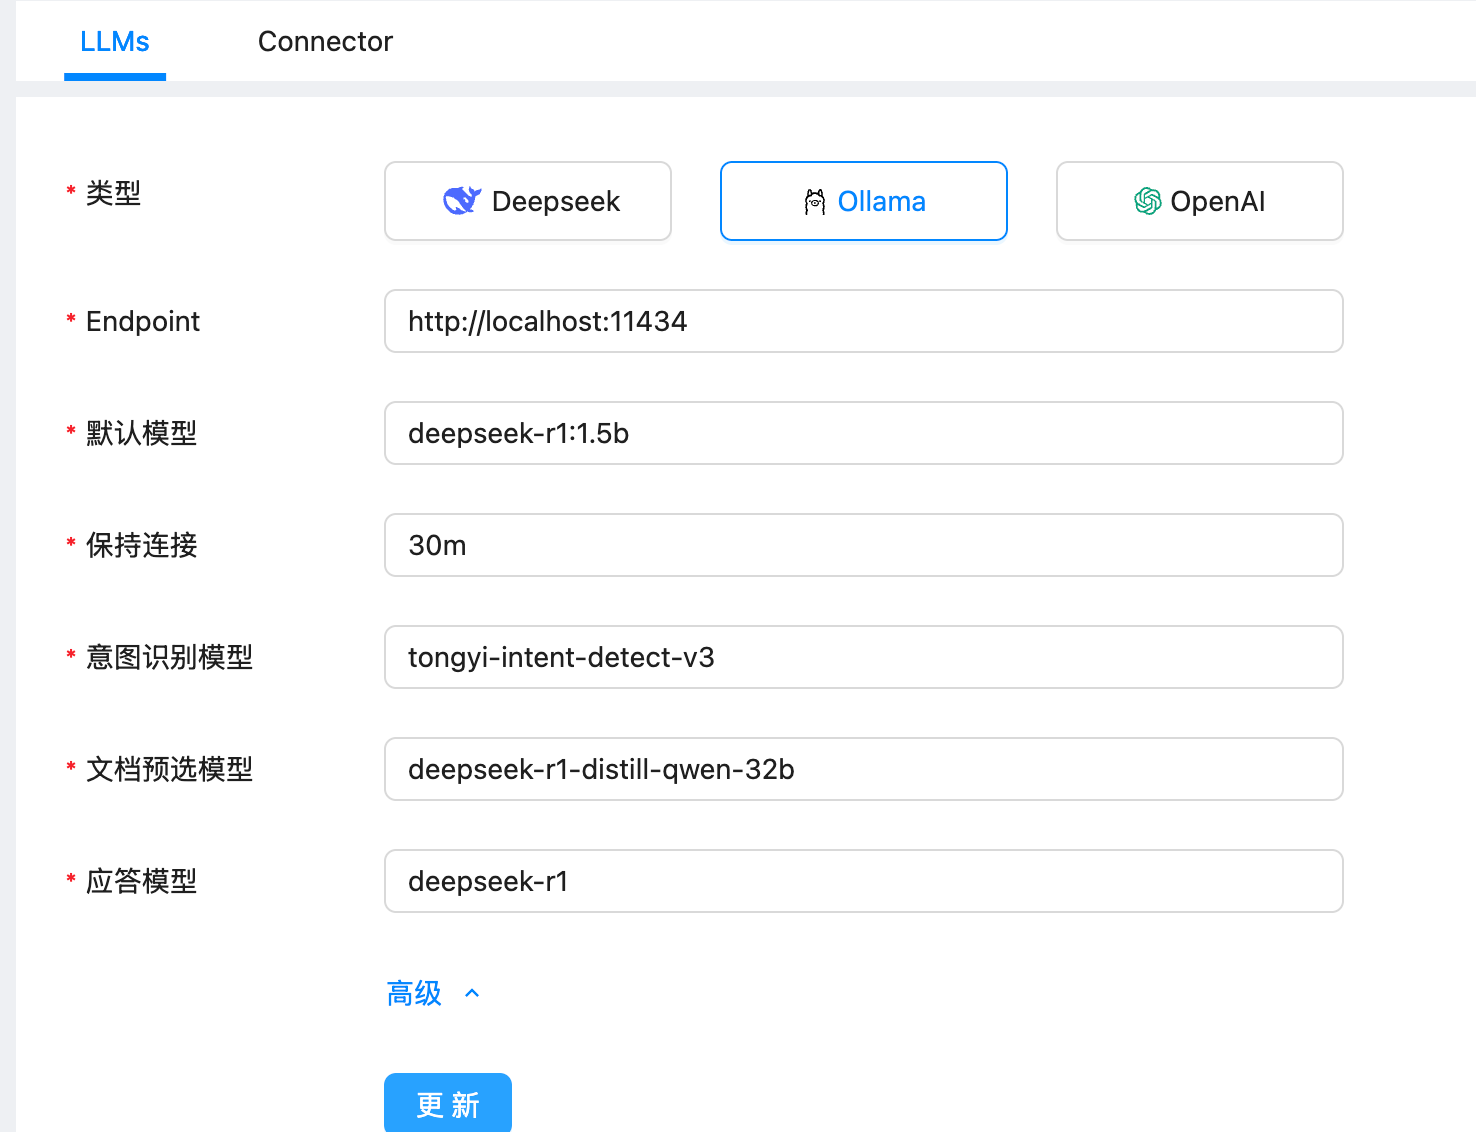
然后进入后台初始化模型,我这里使用的本地部署的 deepseek:
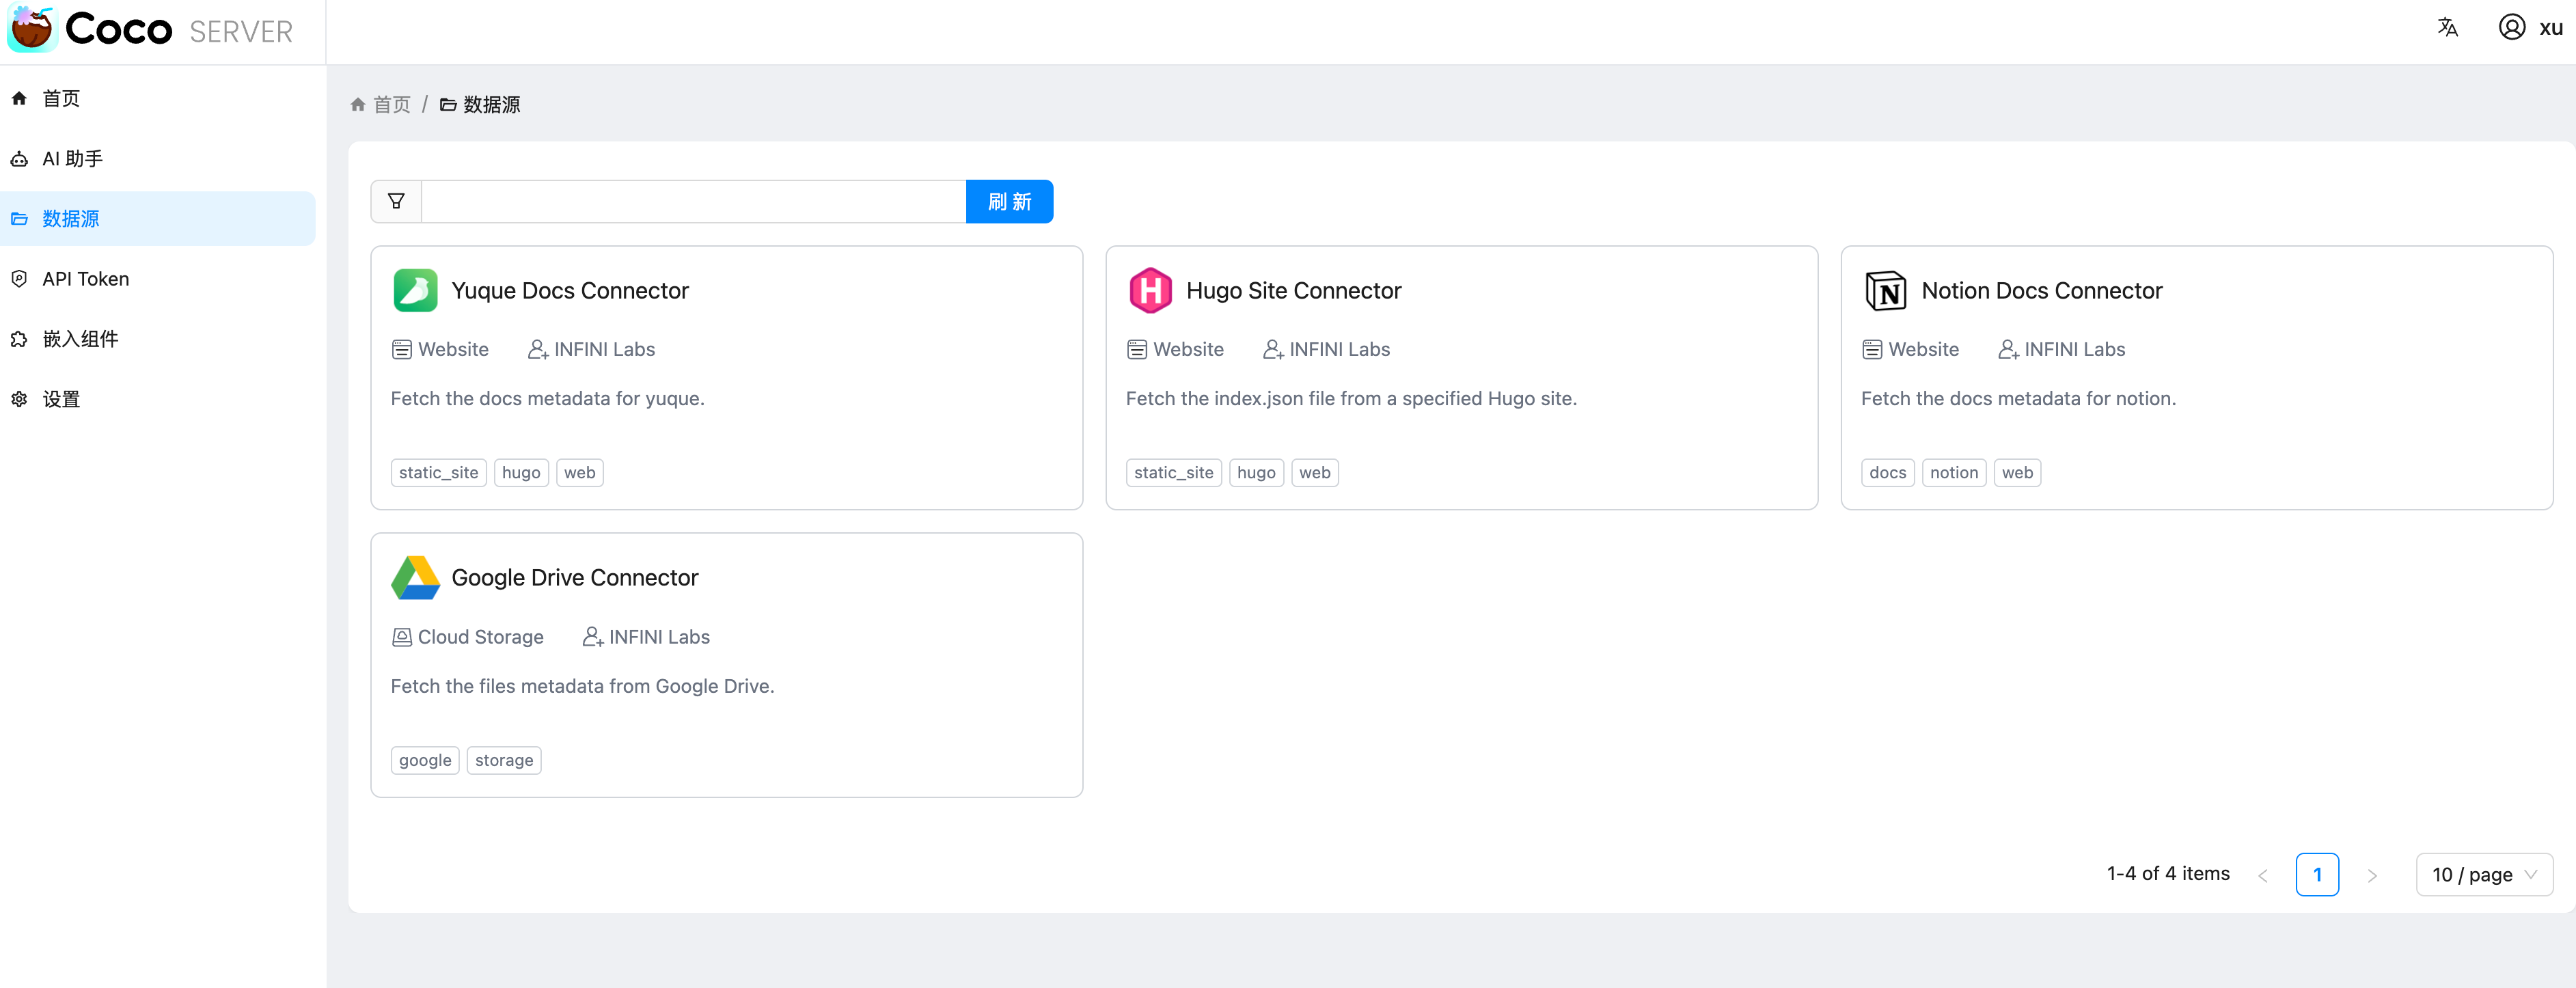
点击数据源,选择 yuque connector
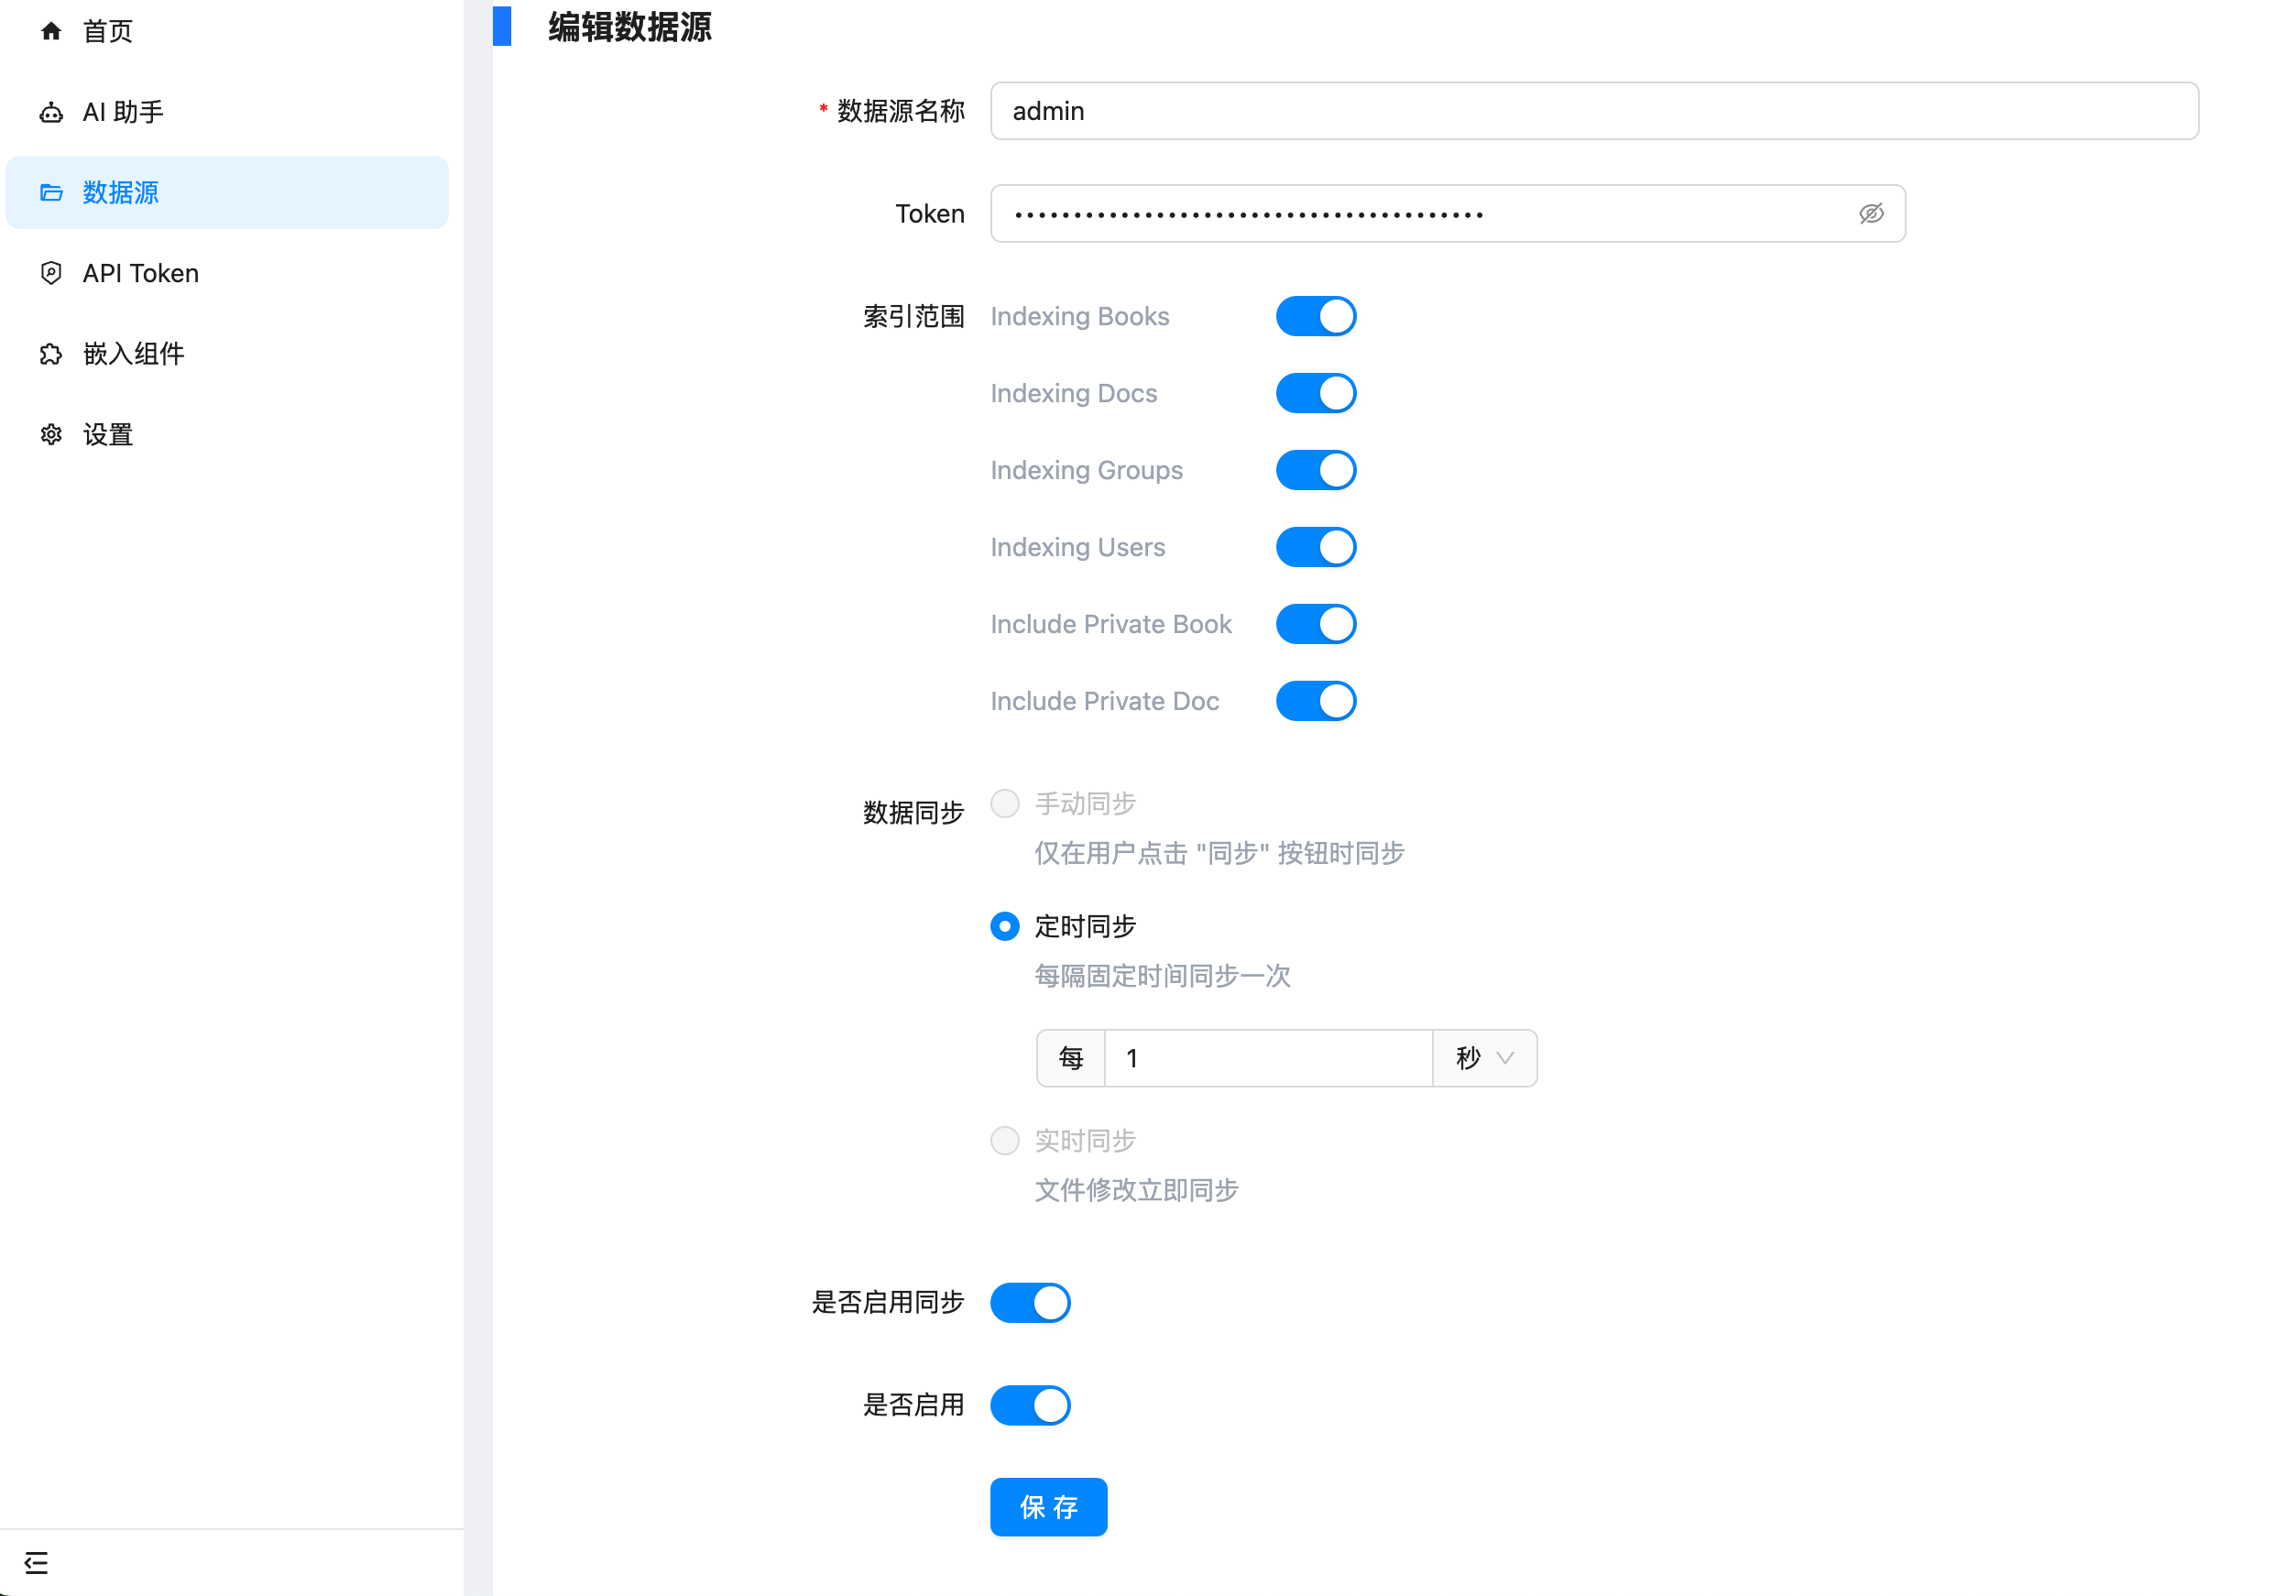
配置的地方很简单,填入数据源名称和 Token 和刷新时间。
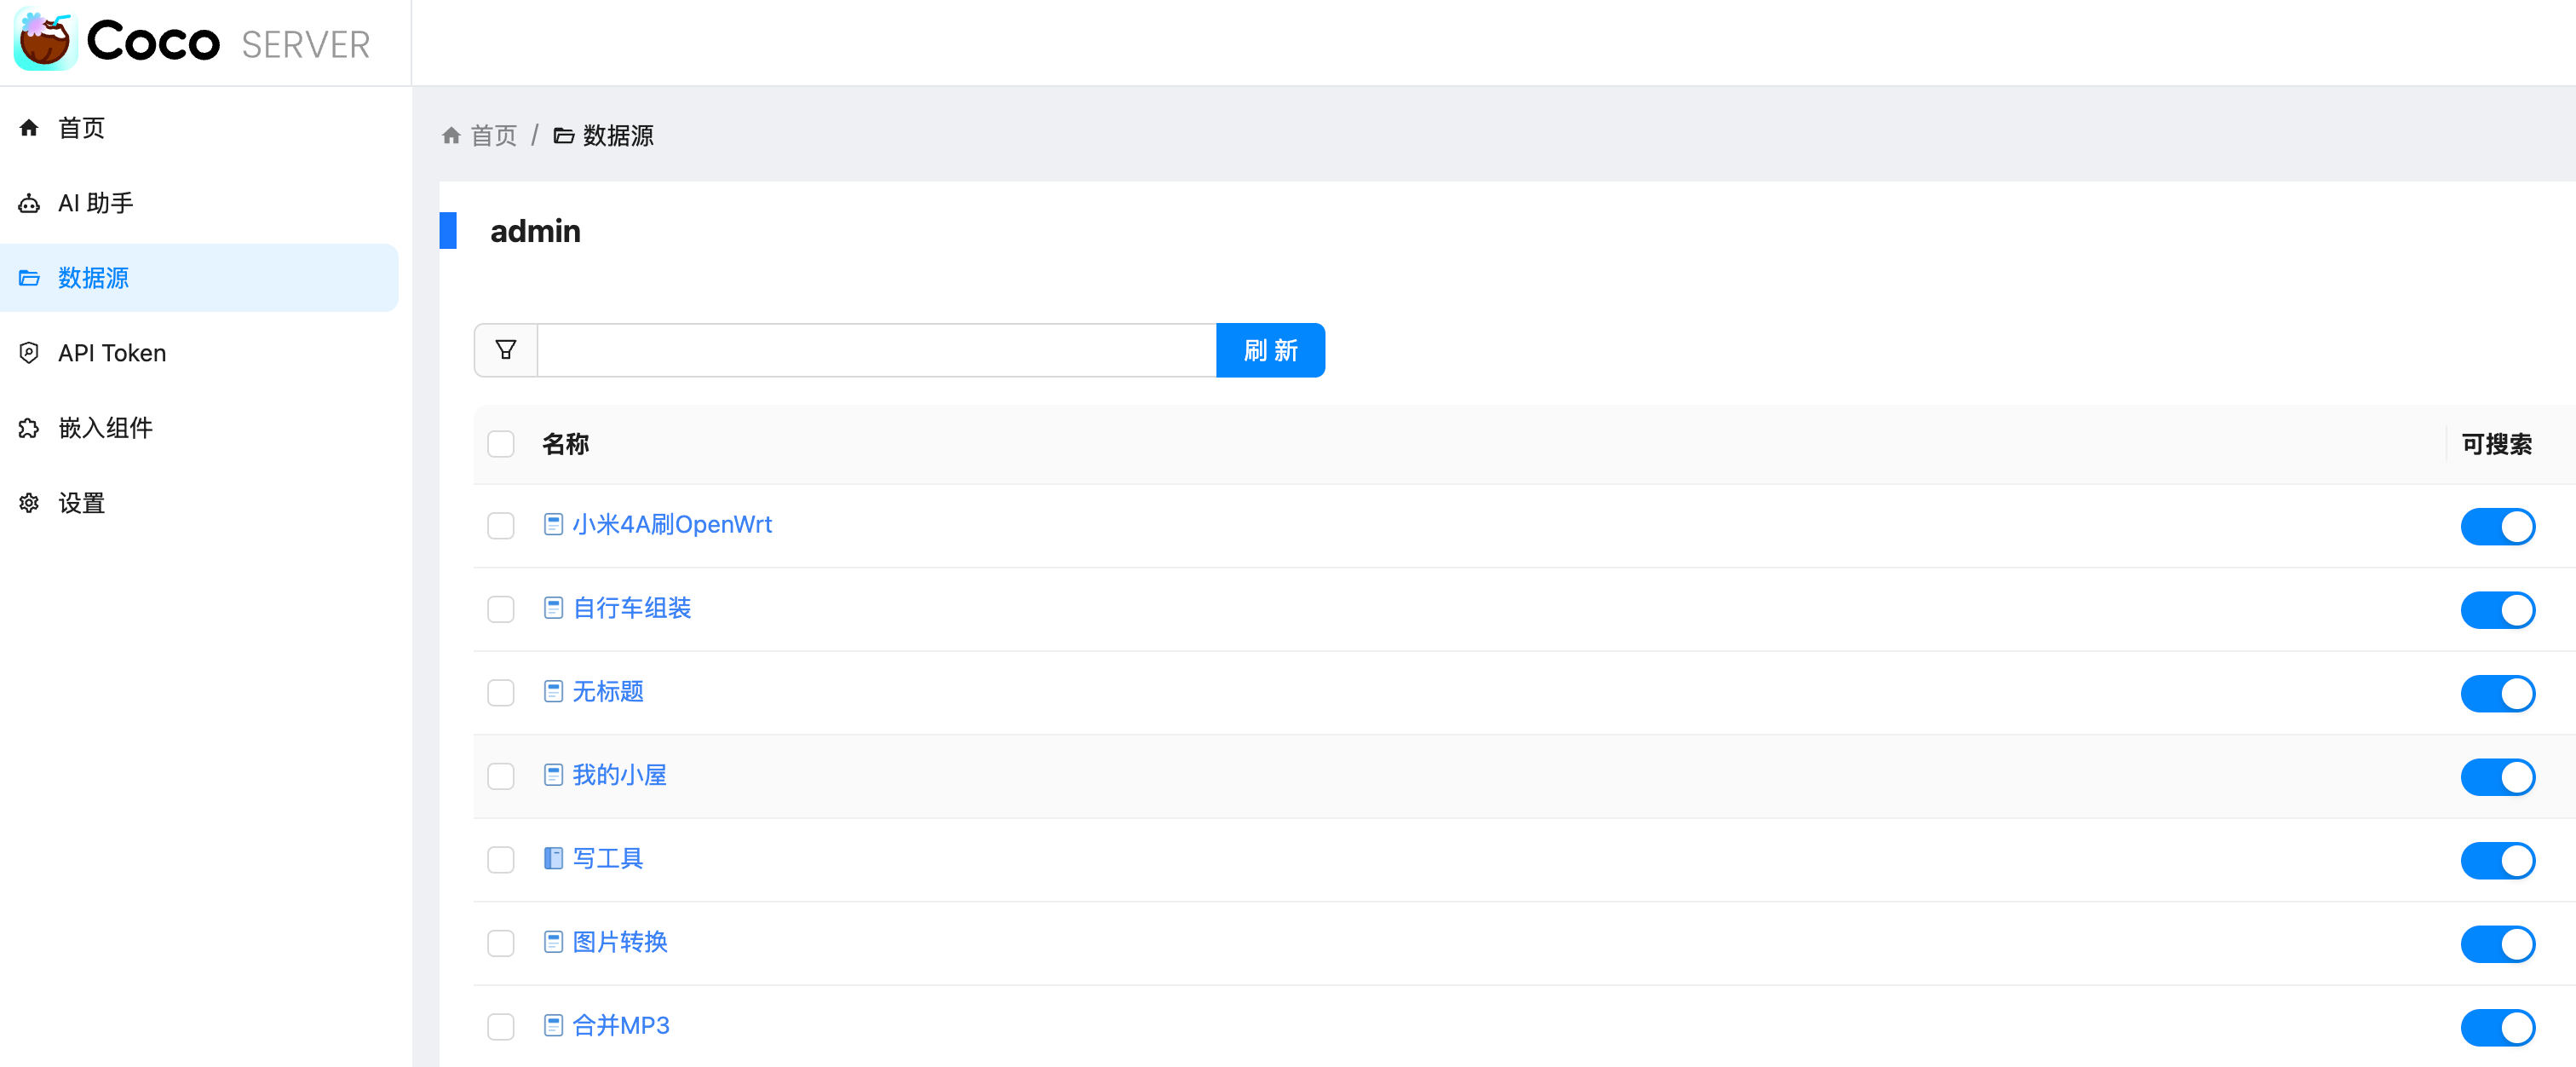
然后我们就可以看到刷新的数据了
评论
0暂无评论