
'%3e%3cpath%20d='M9%2021H15'%20stroke='black'%20stroke-width='2'%20stroke-linecap='round'%20stroke-linejoin='round'/%3e%3cpath%20d='M5.25001%209.75C5.25001%207.95979%205.96116%206.2429%207.22703%204.97703C8.4929%203.71116%2010.2098%203%2012%203C13.7902%203%2015.5071%203.71116%2016.773%204.97703C18.0388%206.2429%2018.75%207.95979%2018.75%209.75C18.75%2013.1081%2019.5281%2015.8063%2020.1469%2016.875C20.2126%2016.9888%2020.2472%2017.1179%2020.2474%2017.2493C20.2475%2017.3808%2020.2131%2017.5099%2020.1475%2017.6239C20.082%2017.7378%2019.9877%2017.8325%2019.8741%2017.8985C19.7604%2017.9645%2019.6314%2017.9995%2019.5%2018H4.50001C4.36874%2017.9992%204.23997%2017.964%204.12659%2017.8978C4.0132%2017.8317%203.91916%2017.7369%203.85387%2017.6231C3.78858%2017.5092%203.75432%2017.3801%203.75452%2017.2489C3.75472%2017.1176%203.78937%2016.9887%203.85501%2016.875C4.47282%2015.8063%205.25001%2013.1072%205.25001%209.75Z'%20stroke='black'%20stroke-width='2'%20stroke-linecap='round'%20stroke-linejoin='round'/%3e%3c/g%3e%3cdefs%3e%3cclipPath%20id='clip0_4762_133'%3e%3crect%20width='24'%20height='24'%20fill='white'/%3e%3c/clipPath%3e%3c/defs%3e%3c/svg%3e)
'%3e%3cpath%20d='M24%200H0V24H24V0Z'%20fill='white'%20fill-opacity='0.01'/%3e%3cpath%20d='M12%2011C14.2091%2011%2016%209.20914%2016%207C16%204.79086%2014.2091%203%2012%203C9.79086%203%208%204.79086%208%207C8%209.20914%209.79086%2011%2012%2011Z'%20stroke='black'%20stroke-width='2'%20stroke-linecap='round'%20stroke-linejoin='round'/%3e%3cpath%20d='M4%2021V20.4857C4%2018.5655%204%2017.6055%204.38753%2016.872C4.72841%2016.2269%205.27235%2015.7024%205.94138%2015.3737C6.70196%2015%207.6976%2015%209.68889%2015H14.3111C16.3024%2015%2017.298%2015%2018.0586%2015.3737C18.7276%2015.7024%2019.2716%2016.2269%2019.6125%2016.872C20%2017.6055%2020%2018.5655%2020%2020.4857V21'%20stroke='black'%20stroke-width='2'%20stroke-linecap='round'%20stroke-linejoin='round'/%3e%3c/g%3e%3cdefs%3e%3cclipPath%20id='clip0_4762_139'%3e%3crect%20width='24'%20height='24'%20fill='white'/%3e%3c/clipPath%3e%3c/defs%3e%3c/svg%3e)

打造智能语料库:通过Coco AI Server 实现 Notion 笔记
忘机山人
发布于328天前博客图片修整中,看不了可以先搜索公众号“忘机山人”看。
CoCo Server 部署 RAG,使用 Notion 作为语料库(上)
https://appstore.lazycat.cloud/#/shop/detail/xu.deploy.coco-ai
-
启动 Easysearch,这里把 Easysearch 作为语料库,把 notion 的素材存在 Easysearch
-
启动 ollama,使用 LLM 进行推理
-
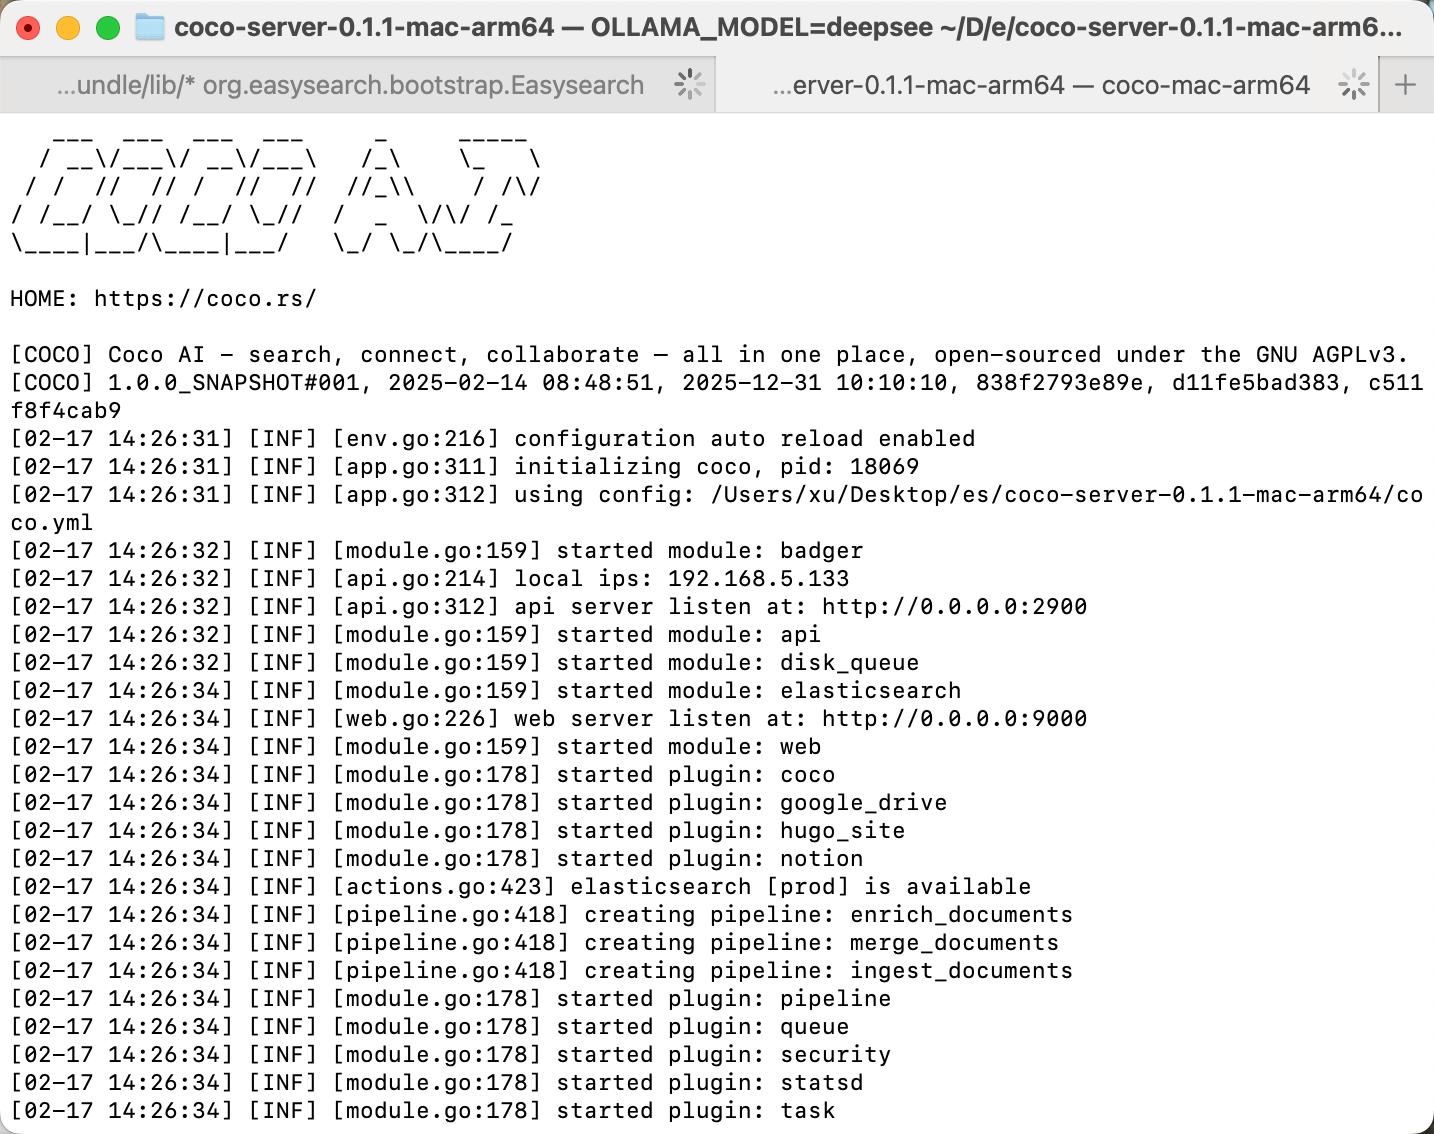
启动 Coco Server,端口在 9000
Coco App 连接 Sever,输入输入
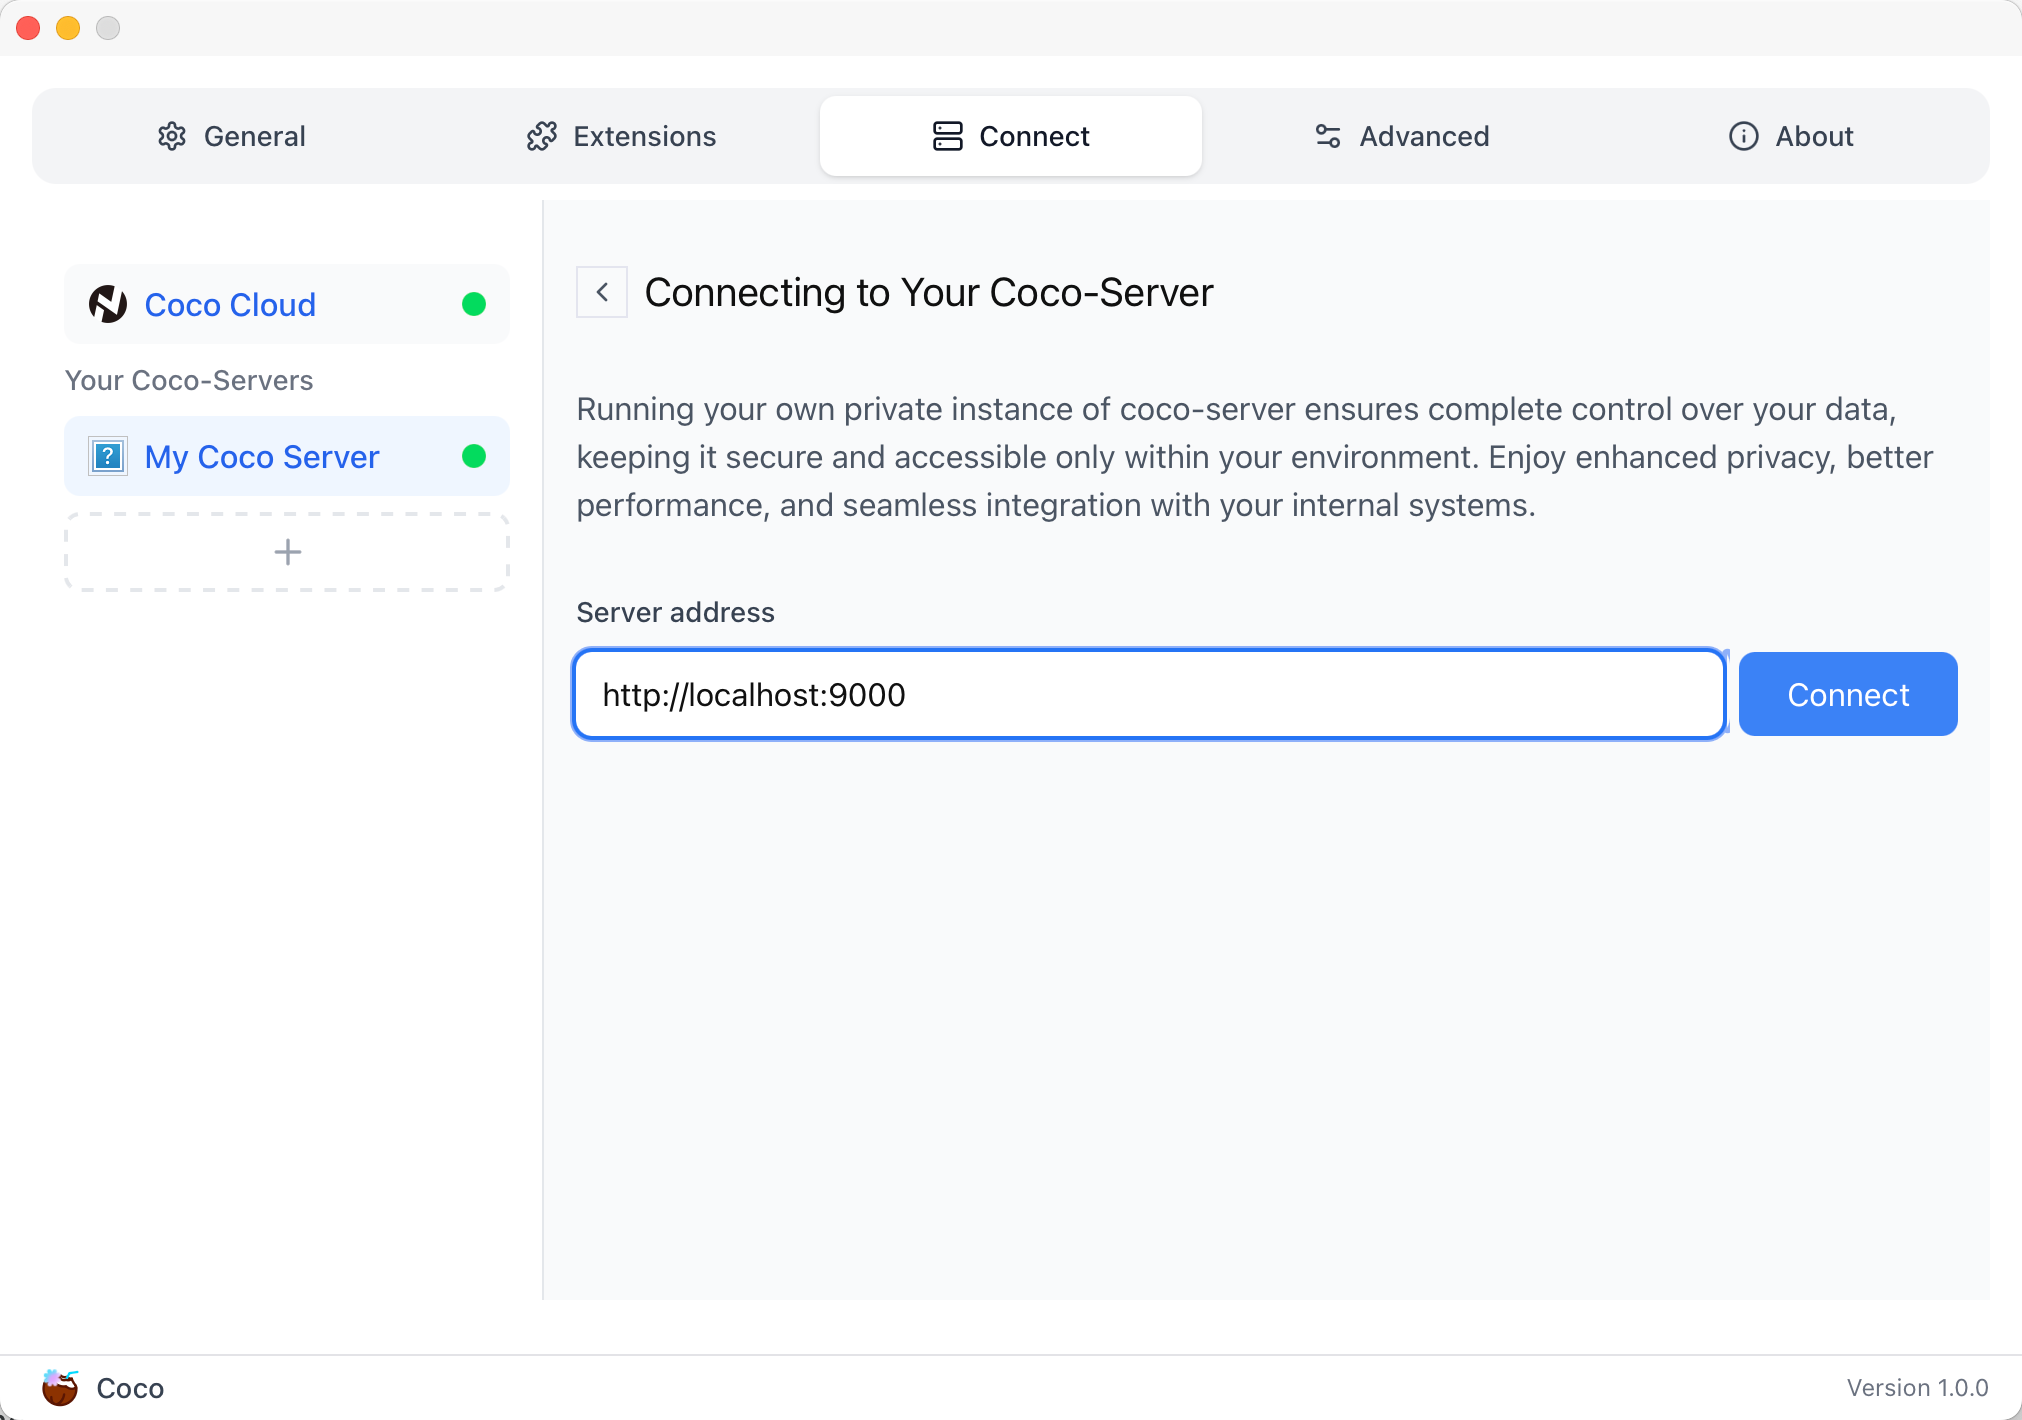
登录自己 server,依旧使用 Github 登录

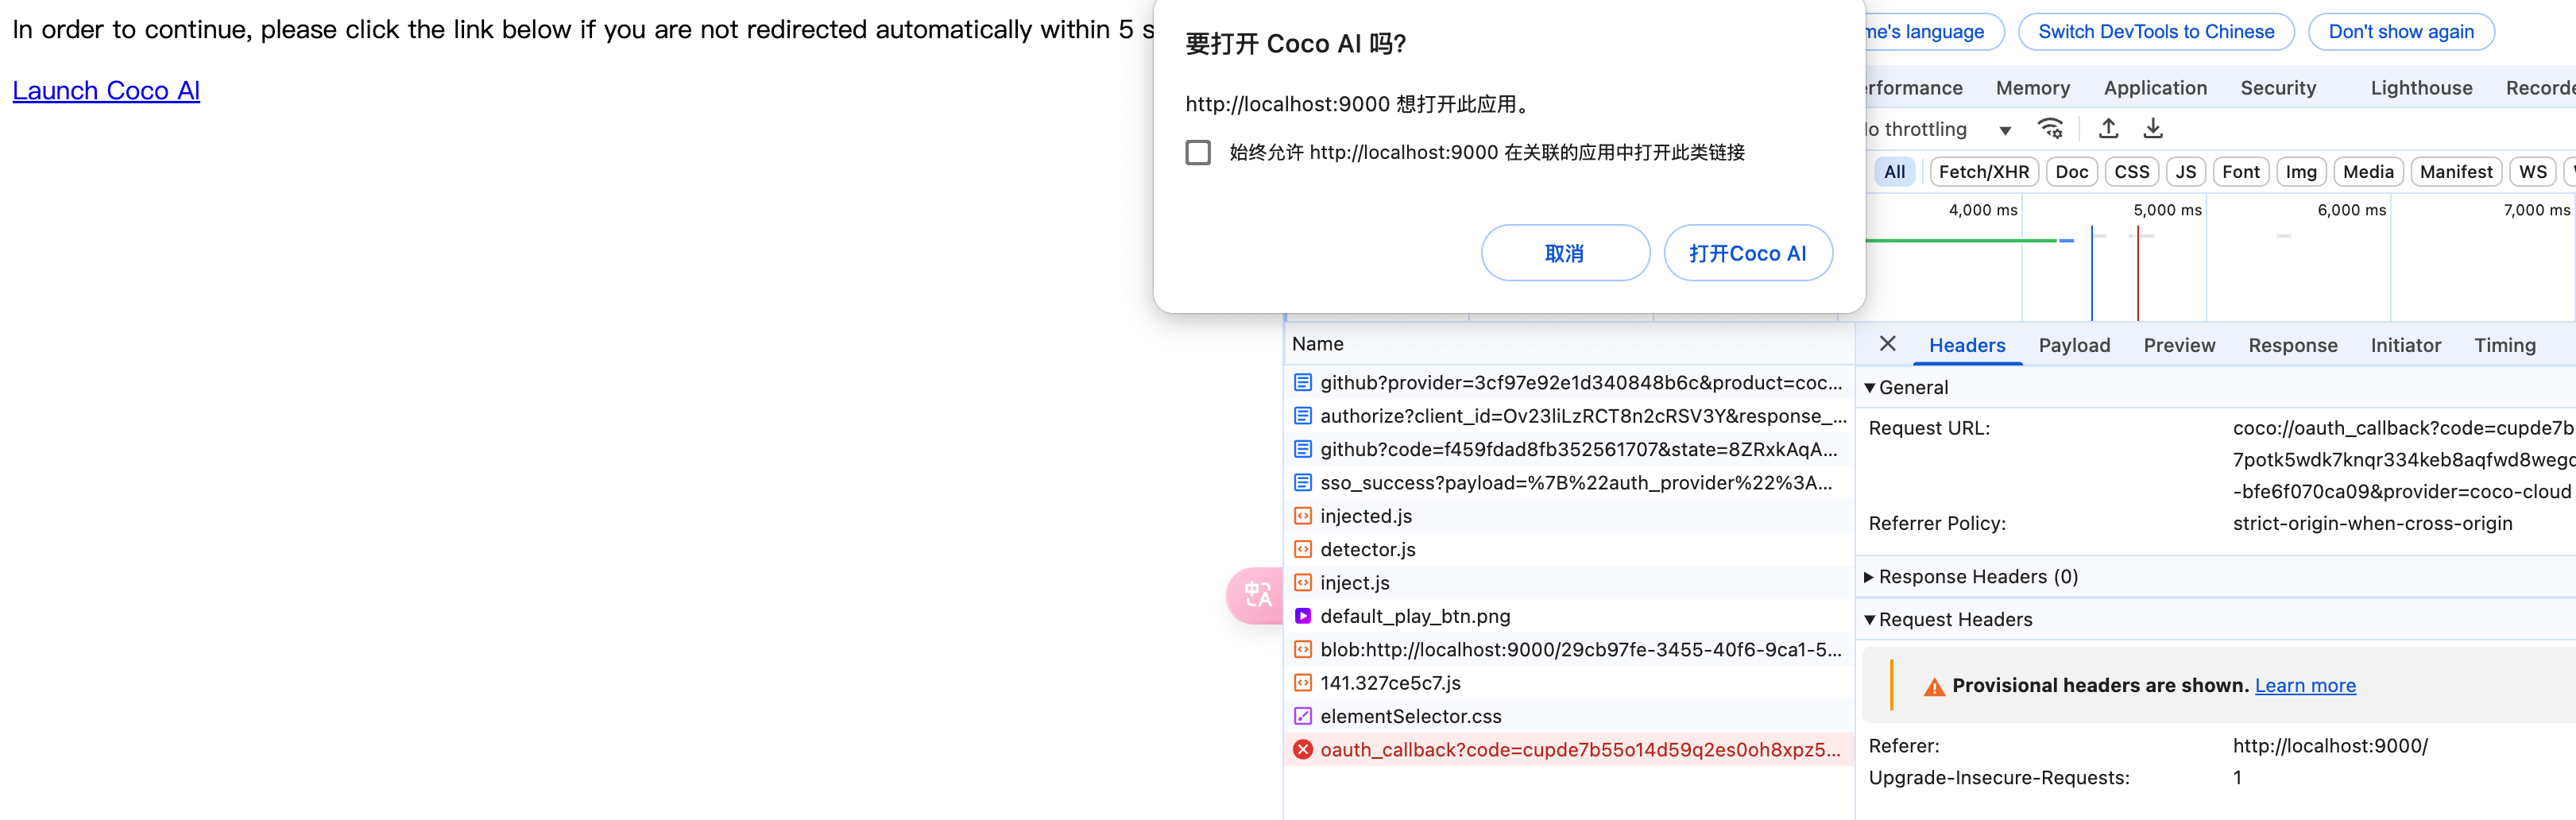
Github 登录之后的重定向,我们目前需要抓取最后的, 后面用这个 token 换取访问 Coco Server AI 的 key:
coco://oauth_callback?code=cupibub55o1cfqbveps0q804ai6aj14in3u91xjhvuk8s7ixirjsq2j9mmyyeut91nmgjwz0b494ngpk&request_id=eb94762b-f054-4710-9c6cf20889d3&provider=coco-cloud
认证步骤如下:
会返回一个 Token,记录下来,这个是只是临时的, 如 XXABC
第二步:
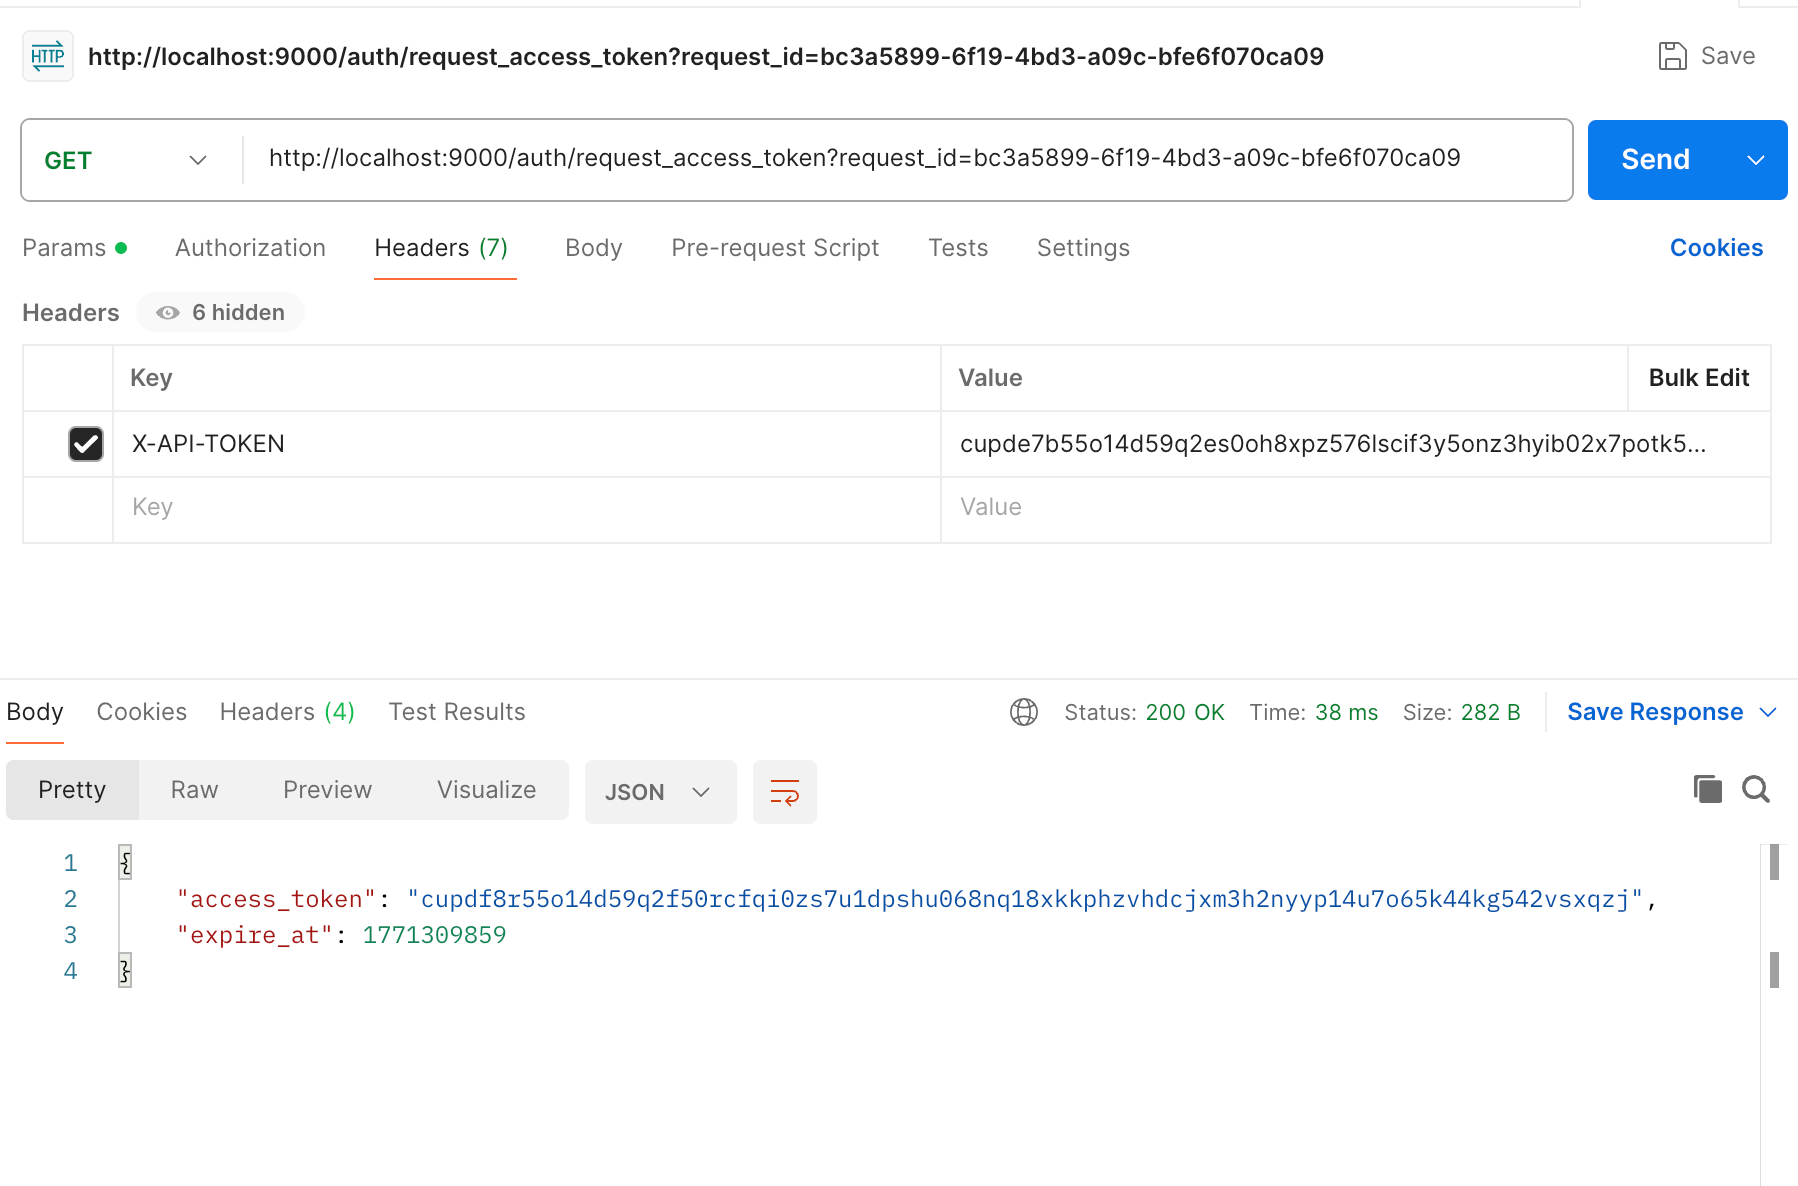
curl -H'X-API-TOKEN: XXABC' "http://localhost:9000/auth/request_access_token?request_id=dd9825e1-ebd3-4c84-9e3f-7ccb0421c508"
返回的才是你要的 Token
在 postman 中换 token,得到 access_token 和过期时间:
import requests

def parse_oauth_callback(url):
    query_params = {param.split('=')[0]: param.split('=')[1] for param in url.split('?')[1].split('&')}
    code = query_params.get("code")
    request_id = query_params.get("request_id")
    return code, request_id

def request_access_token(code, base_url, request_id):
    url = f"{base_url}/auth/request_access_token?request_id={request_id}"
    headers = {"X-API-TOKEN": code}
    response = requests.get(url, headers=headers)
    return response.json()

# 示例输入
oauth_callback_url = """
coco://oauth_callback?code=cupibub55o1cfqbveps0q804ai6aj151wu4in3u91xjhvuk8s7ixirjsq2j9mmyyeut91nmgjwz0b494ngpk&request_id=eb94762b-f054-4710-9c6a-0cf2088729d3&provider=coco-cloud
"""
base_url = "http://localhost:9000"

# 解析 code 和 request_id
code, request_id = parse_oauth_callback(oauth_callback_url)

# 发送请求
token_response = request_access_token(code, base_url, request_id)
print(token_response)
可以用 access_key 查看用户信息:
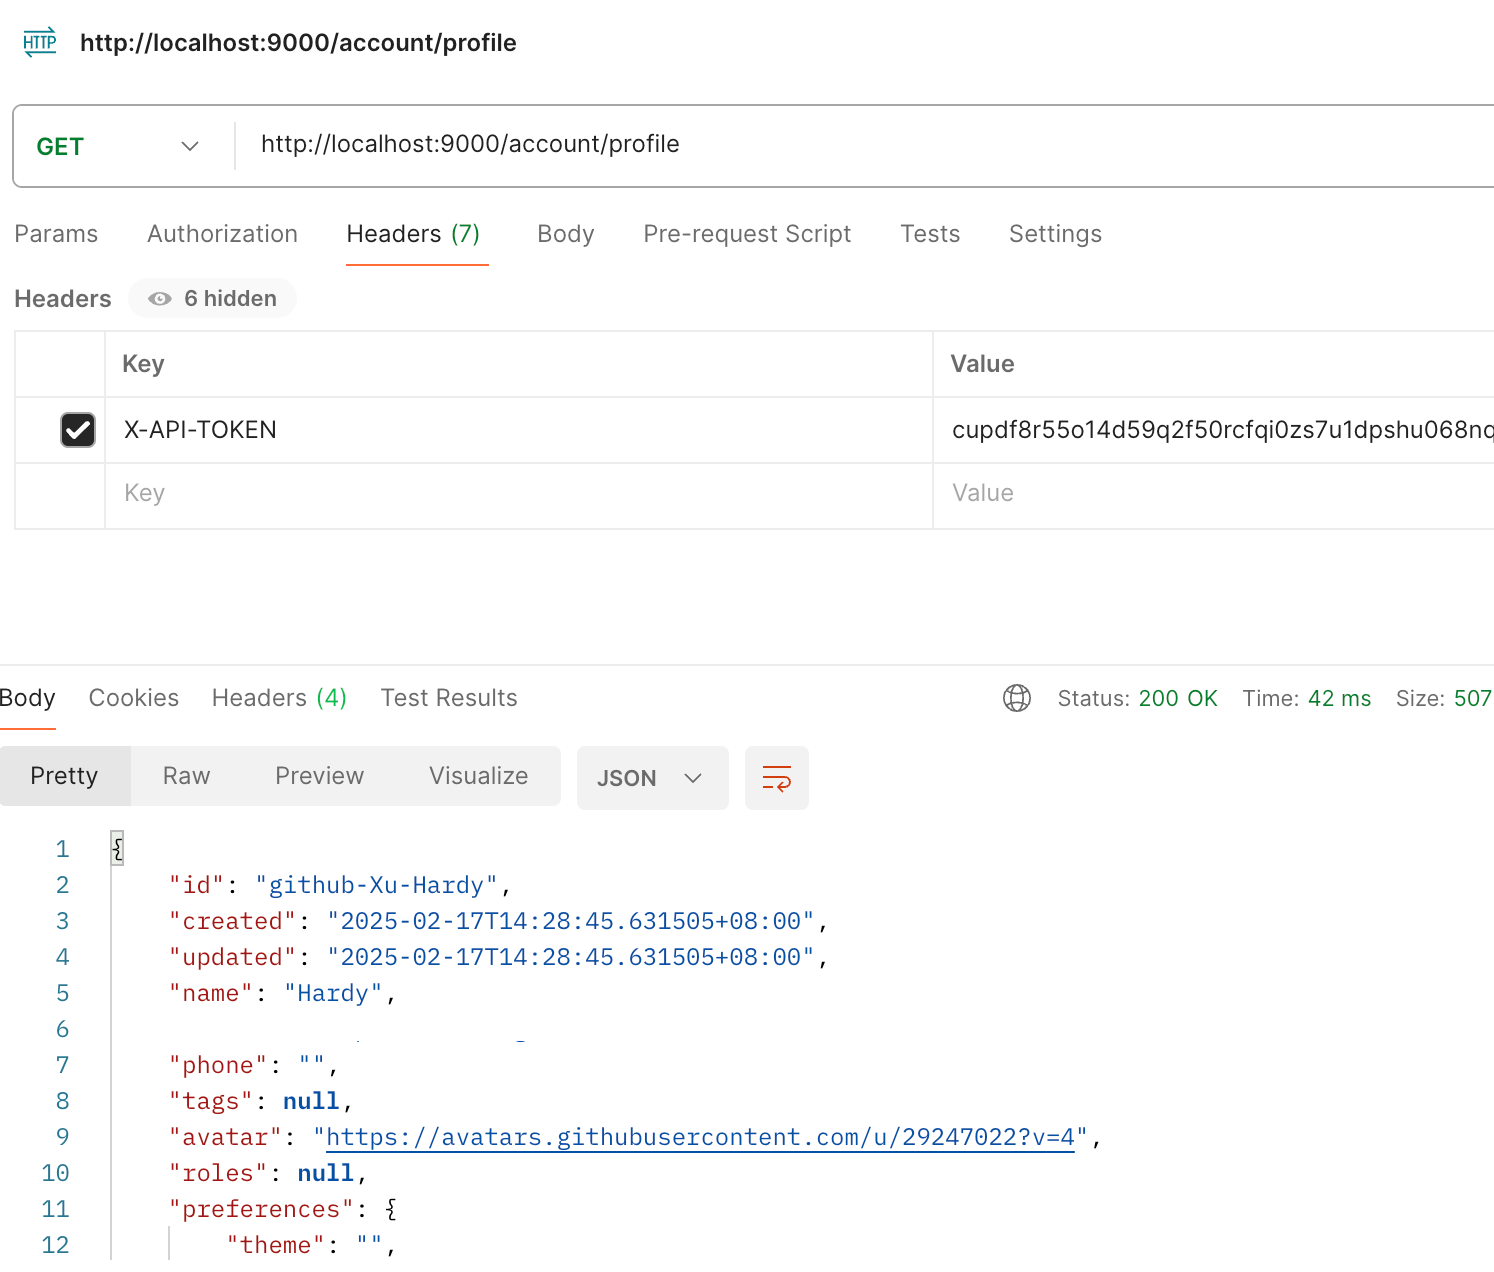
import requests

url = "http://localhost:9000/account/profile"

payload = {}
headers = {
  'X-API-TOKEN': 'cupichb55o1cfqbveq90zwomyxs791ul3esbxxt480c8dzgvdtjtvmcnsld4a5v0wvx9l9ofcf1'
}

response = requests.request("GET", url, headers=headers, data=payload)

print(response.text)
注册 Notion connector:
import requests
import json

def update_connector(base_url, api_token, connector_name, data):
    url = f"{base_url}/connector/{connector_name}?replace=true"
    headers = {
        "X-API-TOKEN": api_token,
        "Content-Type": "application/json"
    }
    response = requests.put(url, headers=headers, data=json.dumps(data))
    return response.json()


base_url = "http://localhost:9000"
api_token = "<token>"


notion_data = {
    "name": "Notion Docs Connector",
    "description": "Fetch the docs metadata for notion.",
    "icon": "/assets/connector/notion/icon.png",
    "category": "website",
    "tags": ["docs", "notion", "web"],
    "url": "http://coco.rs/connectors/notion",
    "assets": {
        "icons": {
            "default": "/assets/connector/notion/icon.png",
            "web_page": "/assets/connector/notion/icon.png",
            "database": "/assets/connector/notion/database.png",
            "page": "/assets/connector/notion/page.png"
        }
    }
}


response_notion = update_connector(base_url, api_token, "notion", notion_data)
print(response_notion)
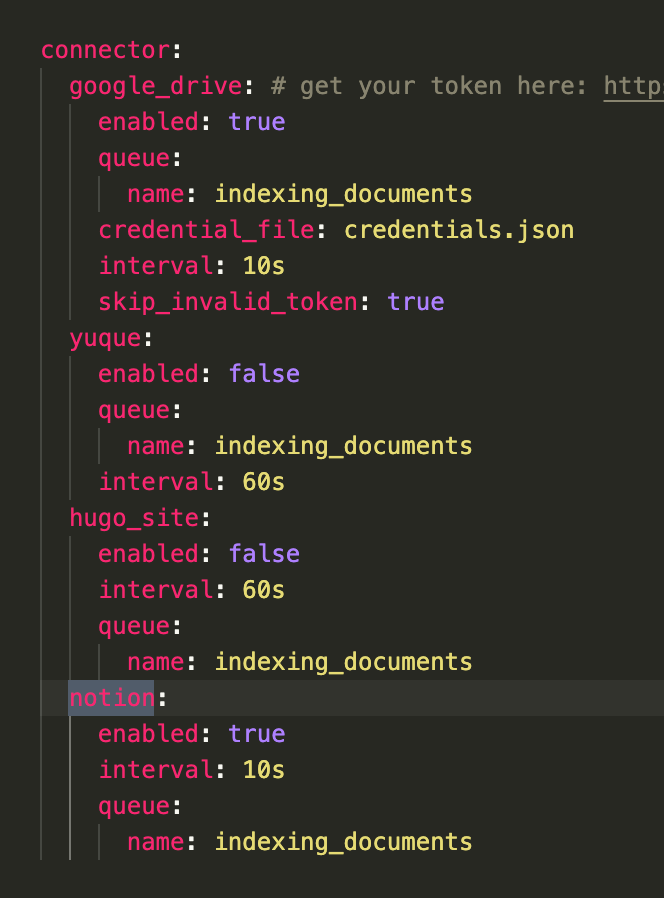
修改 Notion 配置文件,激活检索 Notion:
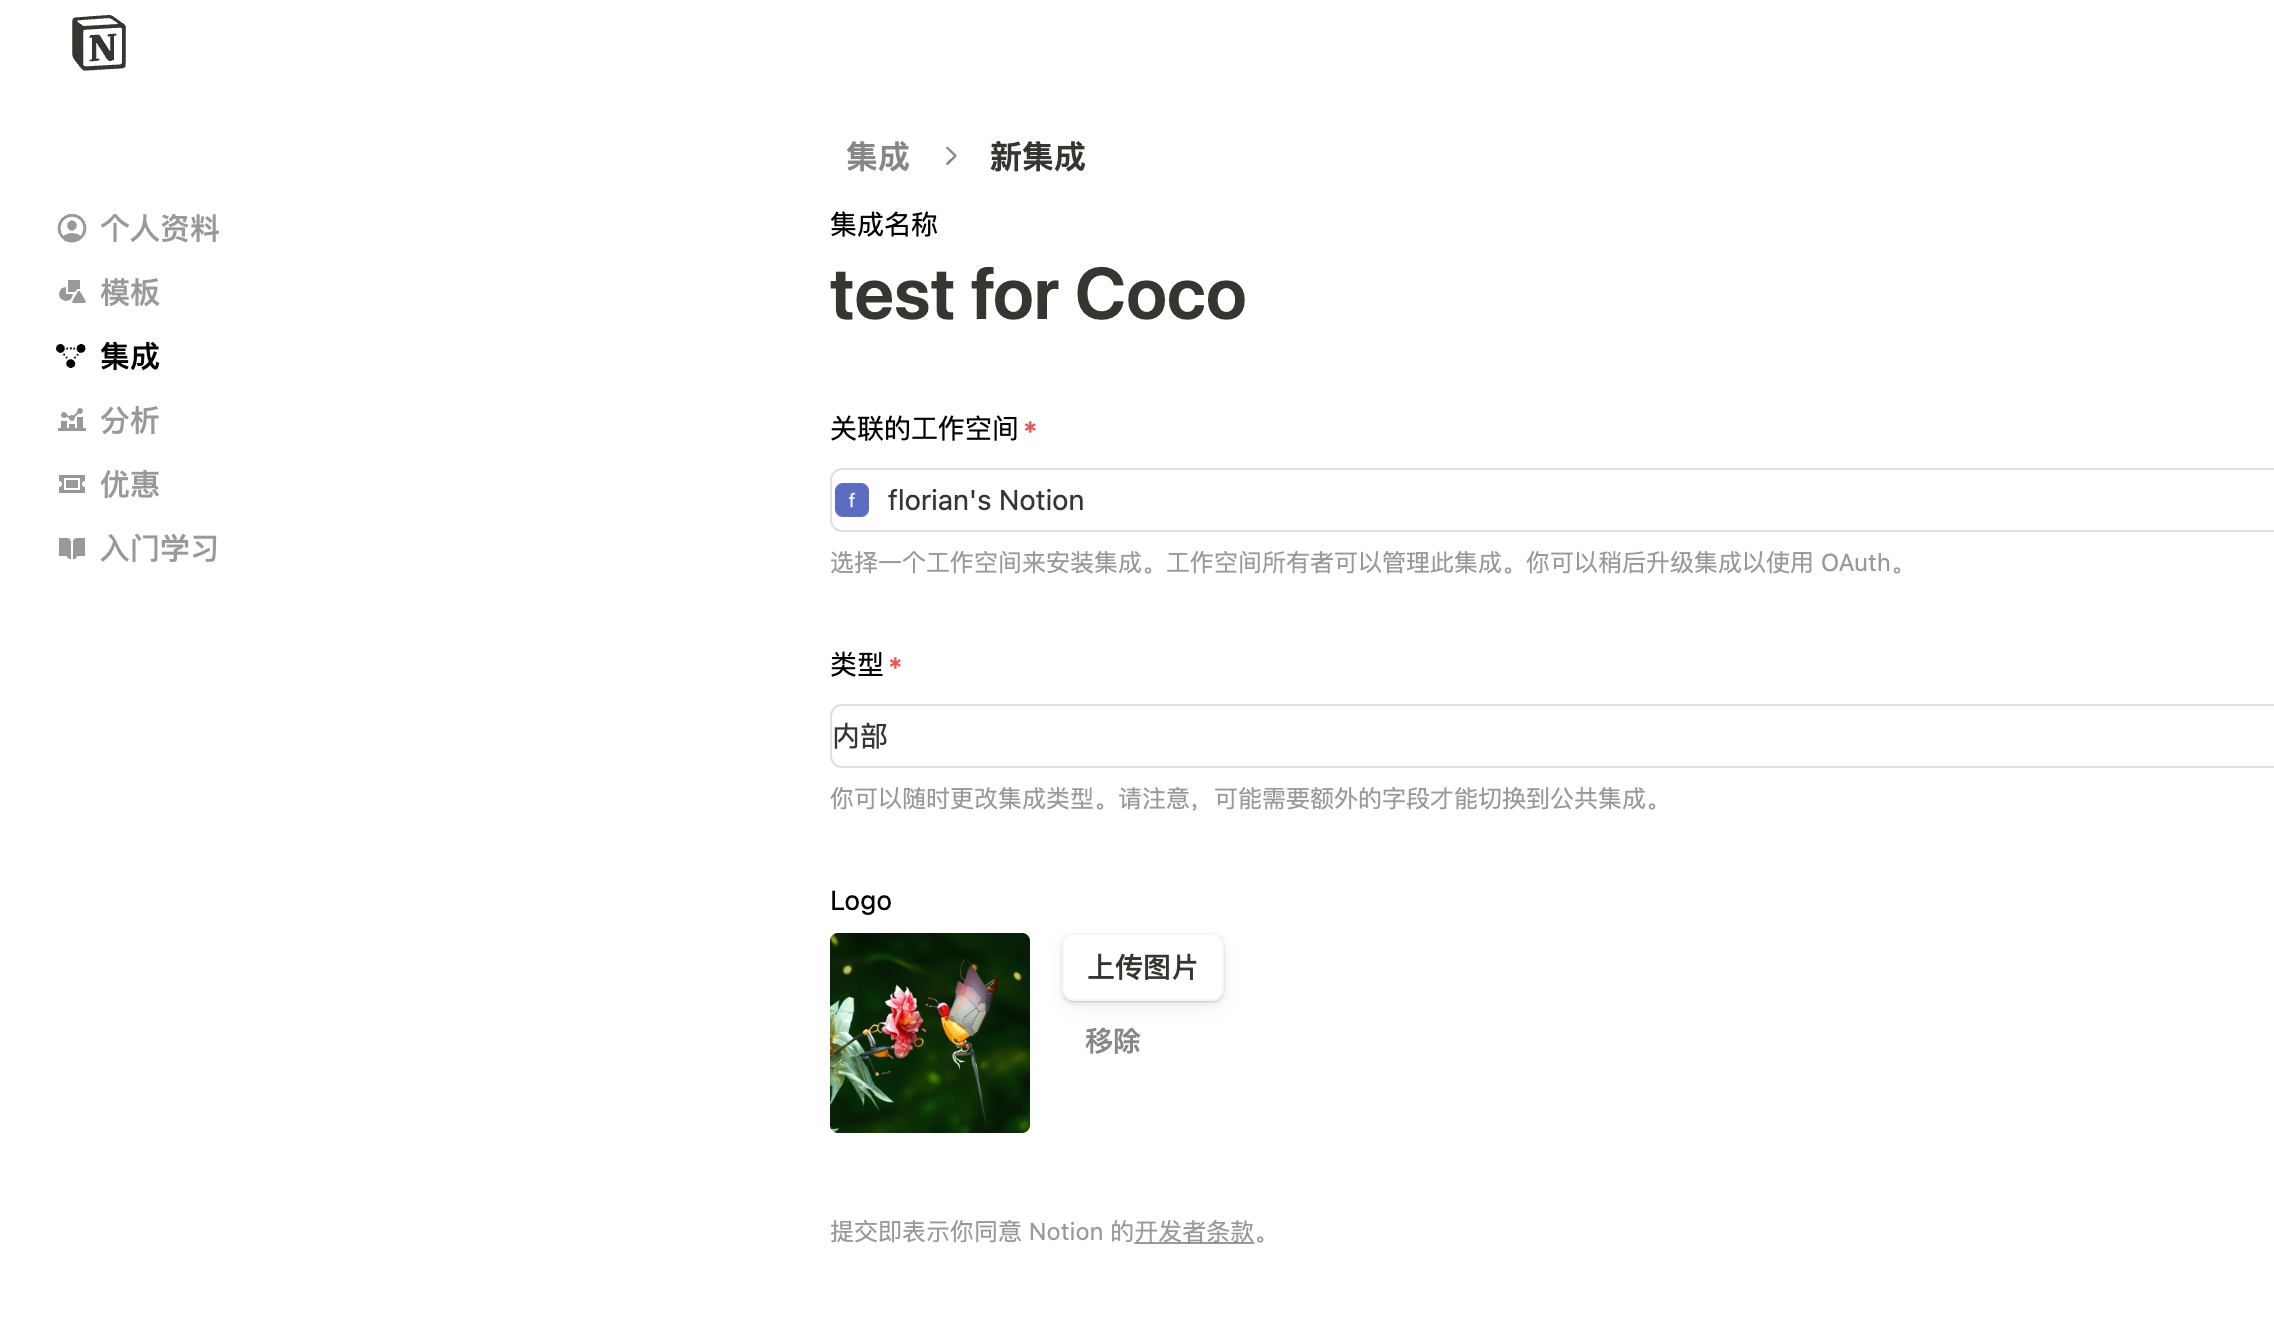
在 Notion 这个网站申请 API key,https://www.notion.so/profile/integrations
配置完成之后,设置权限和展示 apikey
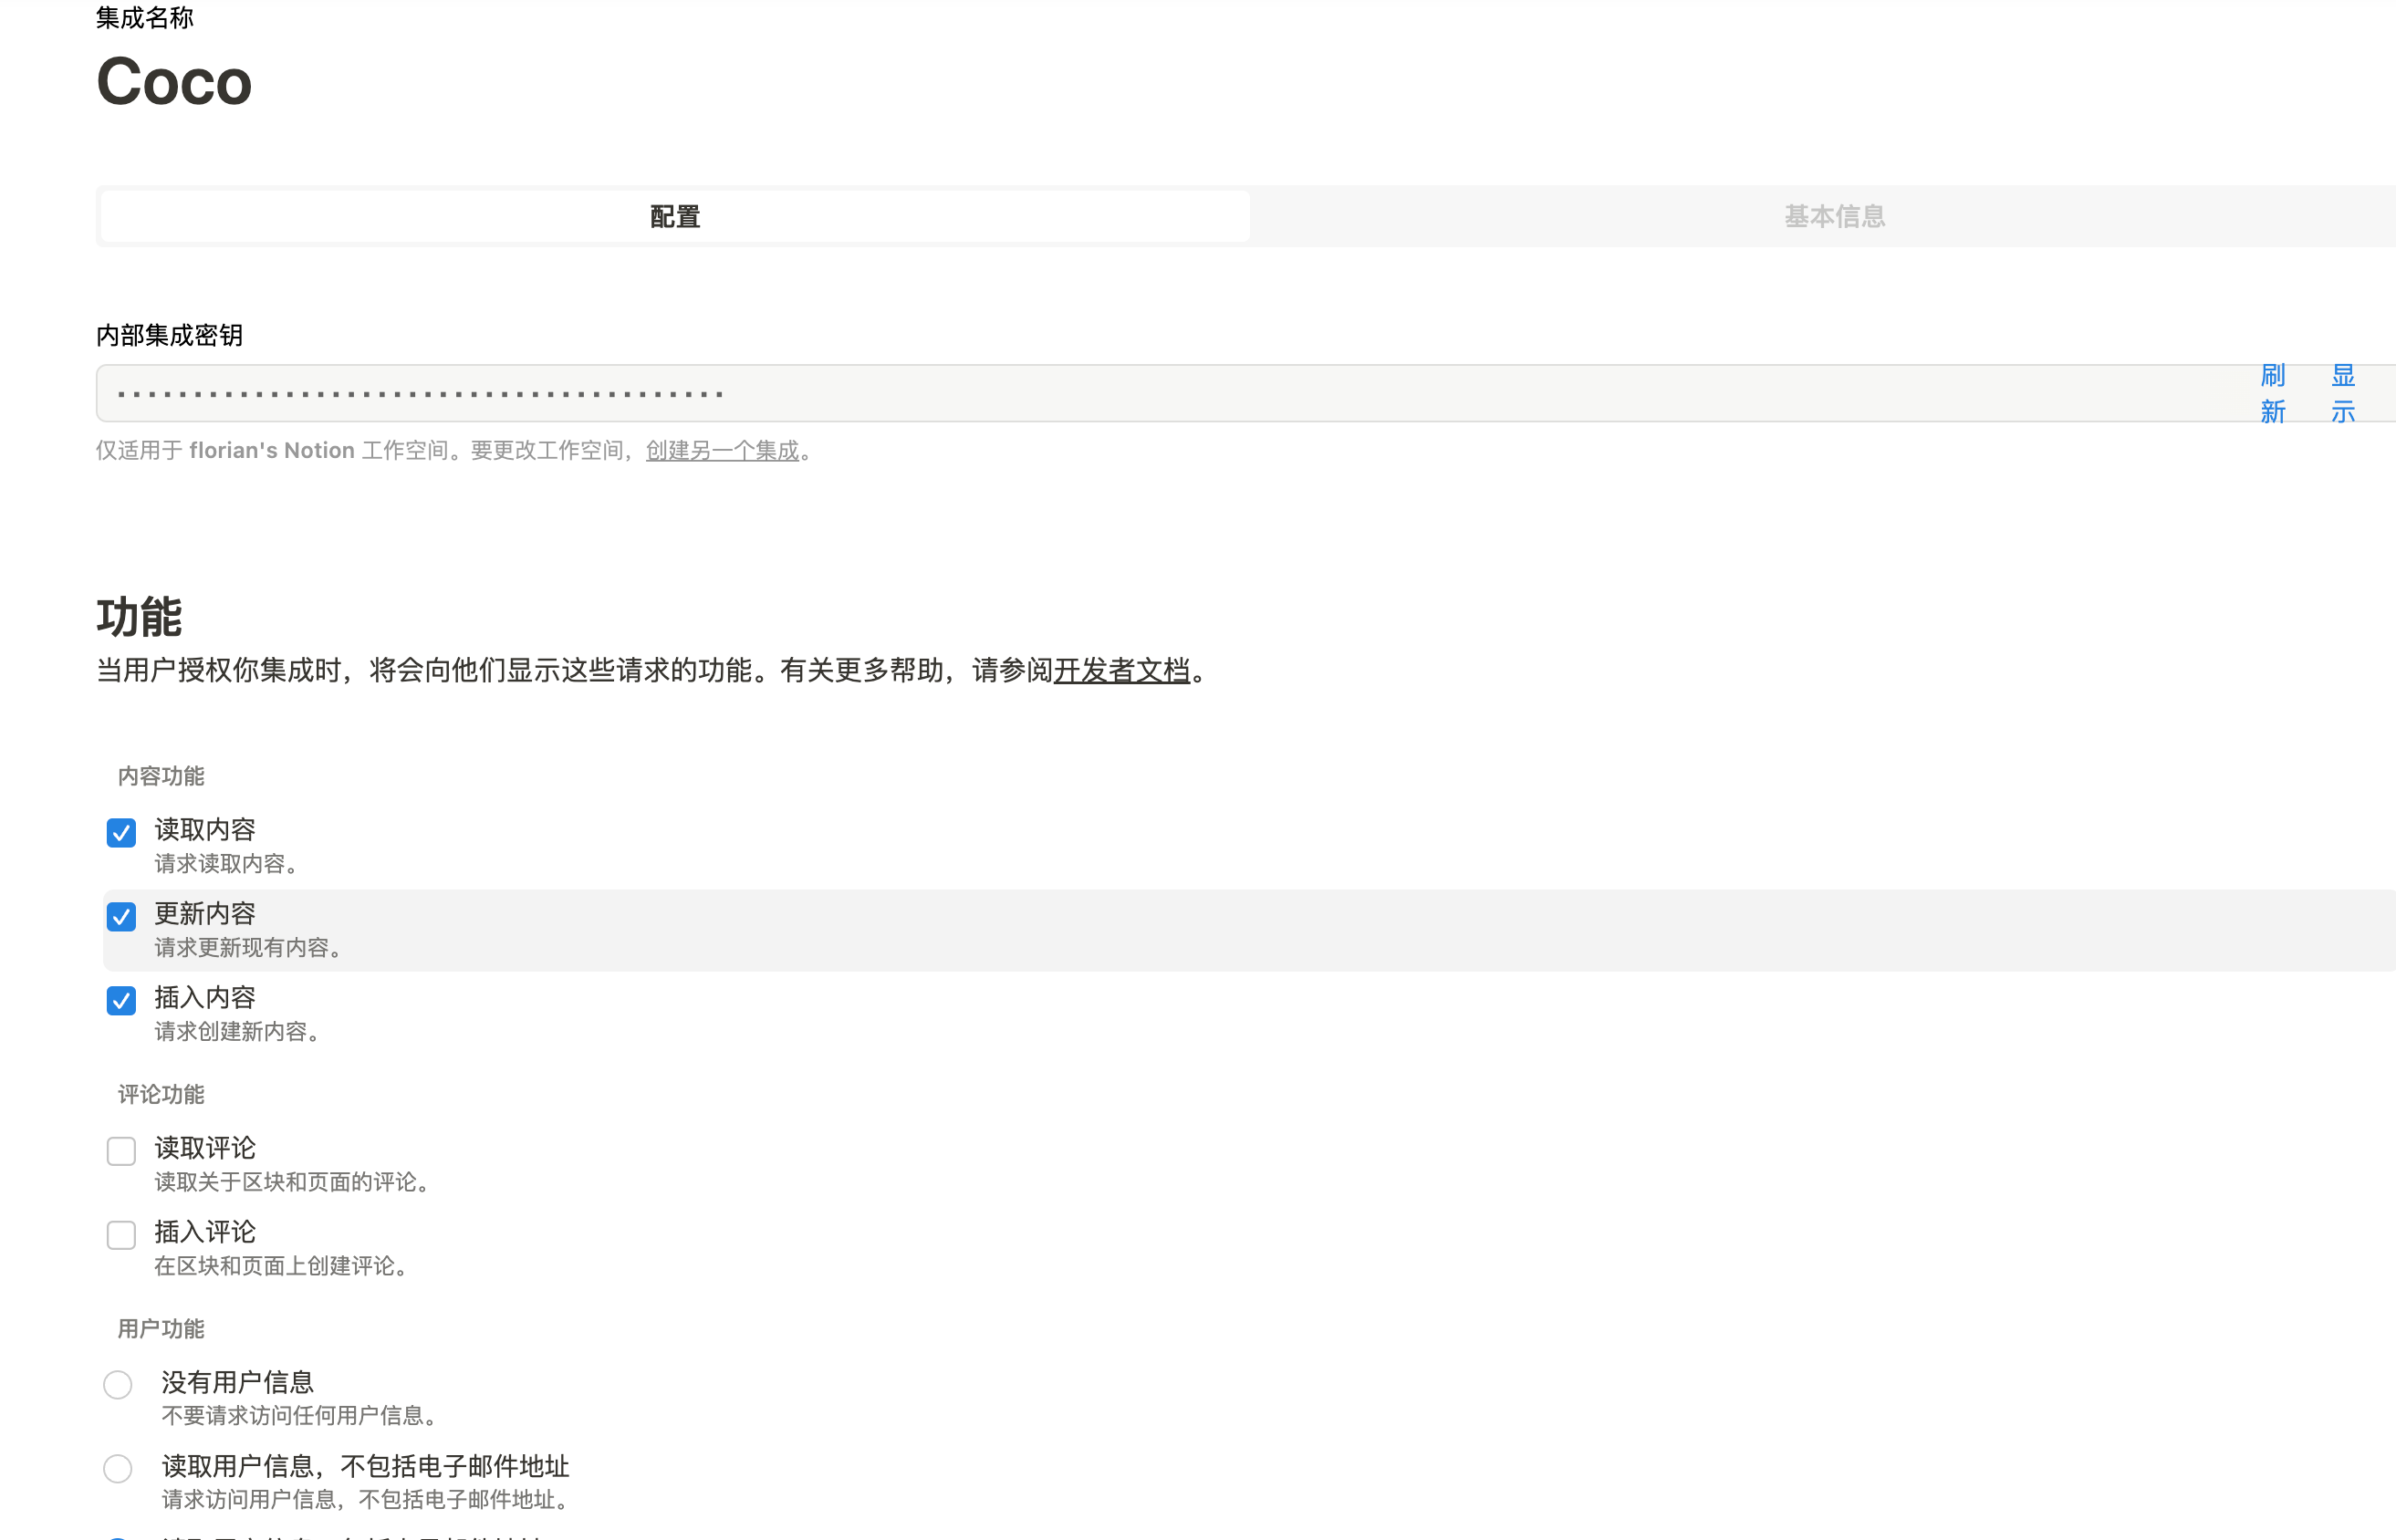
配置 Notion Connector,这里需要用到 Notion 的 API Key:
import requests
import json

def create_datasource(base_url, api_token, data):
    url = f"{base_url}/datasource/"
    headers = {
        "X-API-TOKEN": api_token,
        "Content-Type": "application/json"
    }
    response = requests.post(url, headers=headers, data=json.dumps(data))
    return response.json()

# 示例输入
base_url = "http://localhost:9000"
api_token = "<api-key>"

datasource_data = {
    "name": "My Notion",
    "type": "connector",
    "connector": {
        "id": "notion",
        "config": {
            "token": "<notion token>"
        }
    }
}

# 发送 POST 请求
response = create_datasource(base_url, api_token, datasource_data)
print(response)
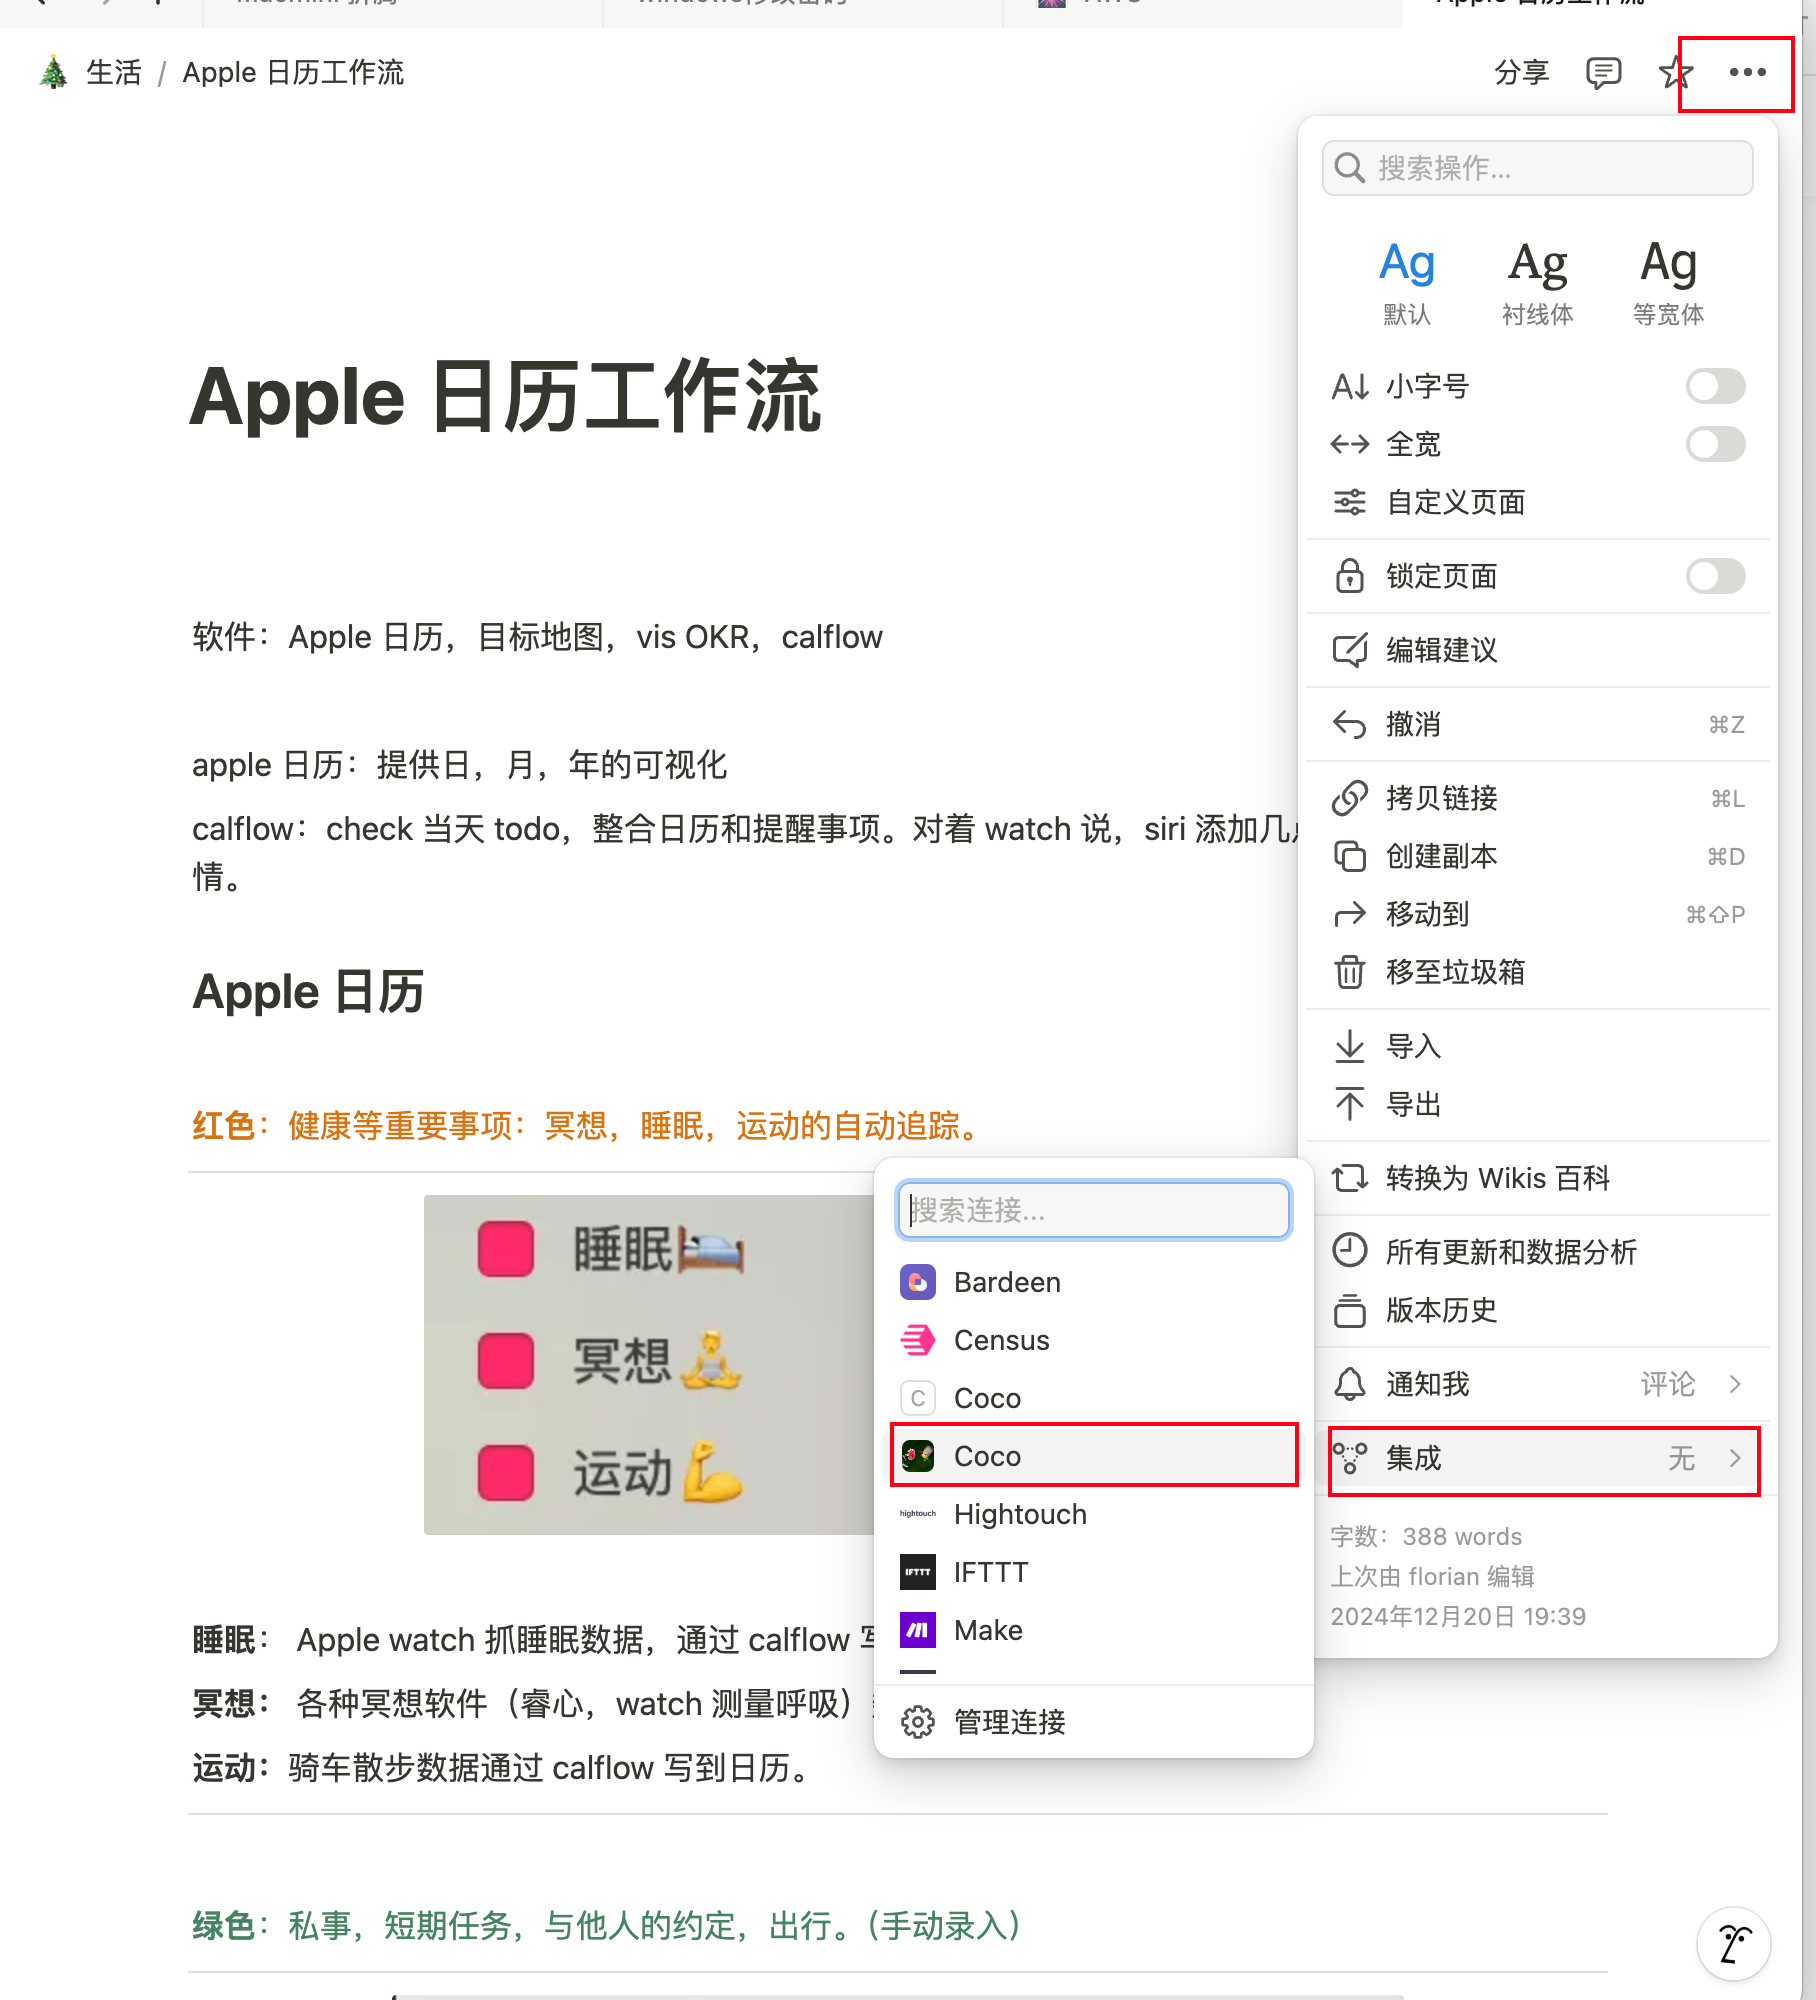
需要在 Notion 中设置集成,这样 Coco Server 才会搜索到:
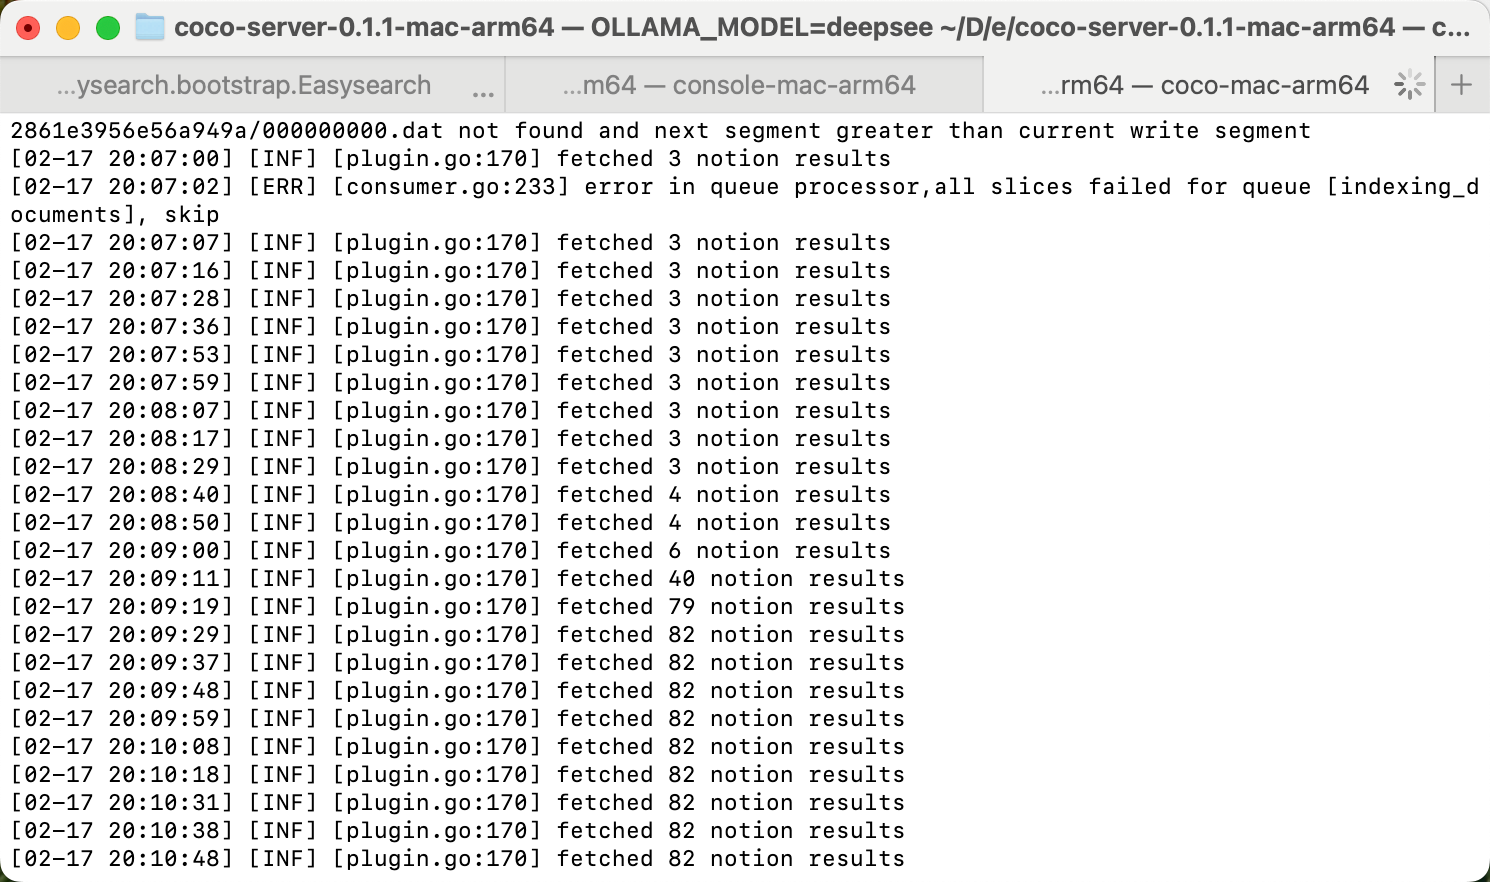
Coco server 日志中可以检索到 notion 了:
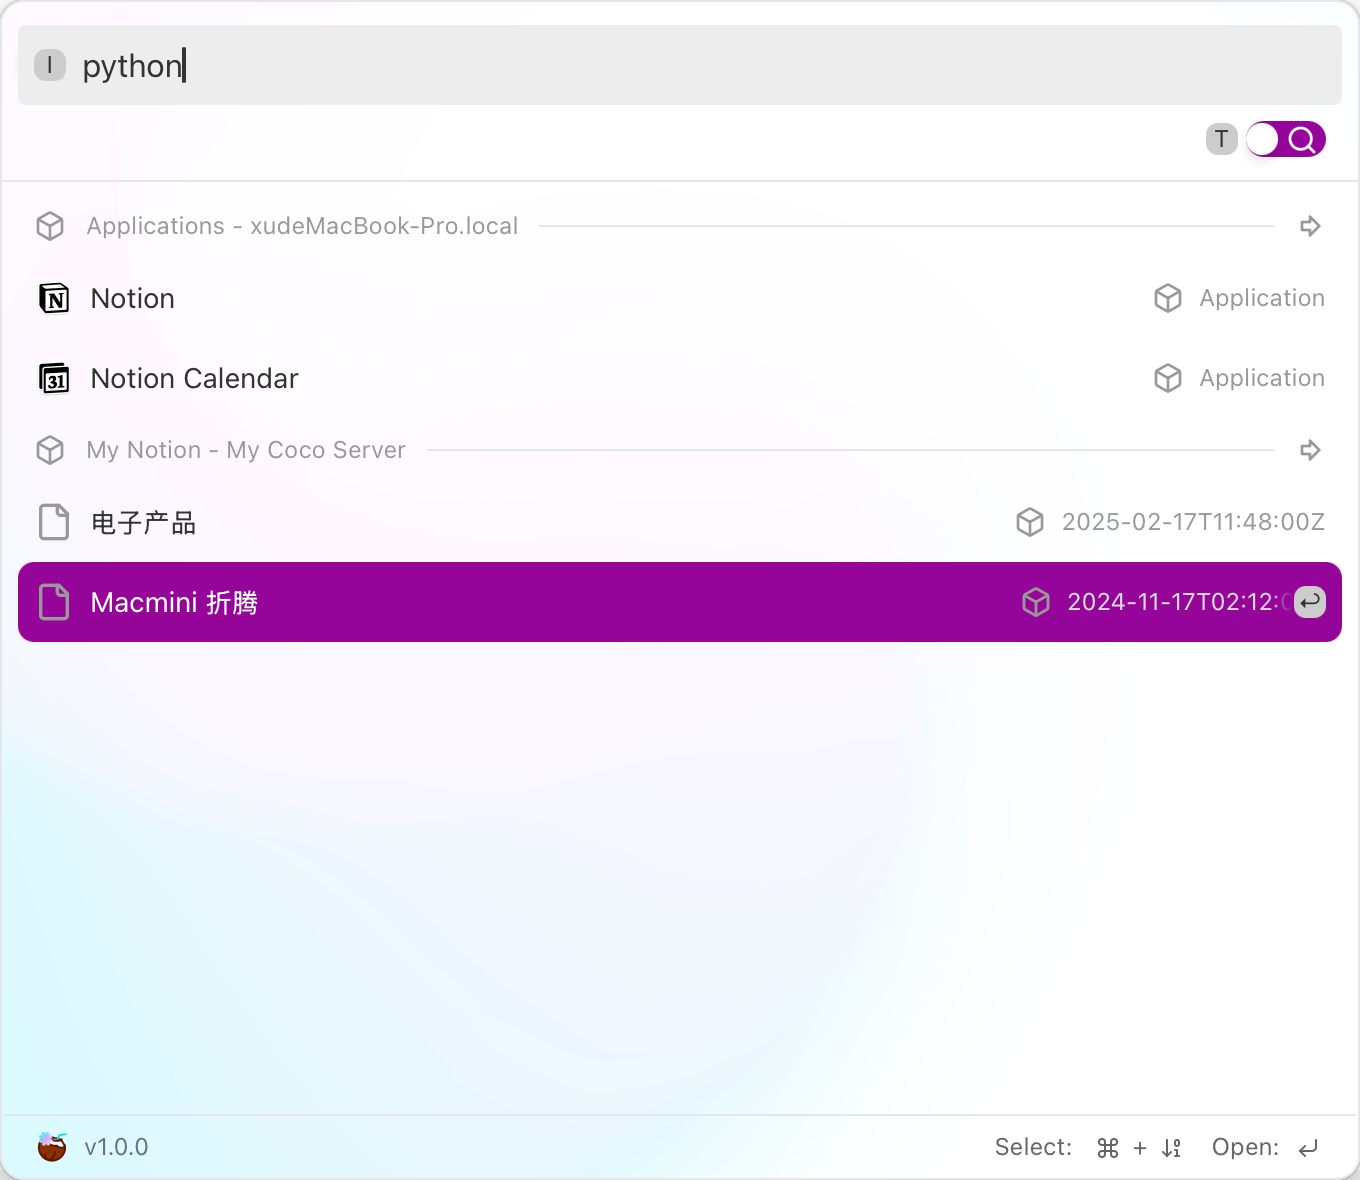
终于可以在搜索栏检索到了。
评论
0暂无评论