
'%3e%3cpath%20d='M9%2021H15'%20stroke='black'%20stroke-width='2'%20stroke-linecap='round'%20stroke-linejoin='round'/%3e%3cpath%20d='M5.25001%209.75C5.25001%207.95979%205.96116%206.2429%207.22703%204.97703C8.4929%203.71116%2010.2098%203%2012%203C13.7902%203%2015.5071%203.71116%2016.773%204.97703C18.0388%206.2429%2018.75%207.95979%2018.75%209.75C18.75%2013.1081%2019.5281%2015.8063%2020.1469%2016.875C20.2126%2016.9888%2020.2472%2017.1179%2020.2474%2017.2493C20.2475%2017.3808%2020.2131%2017.5099%2020.1475%2017.6239C20.082%2017.7378%2019.9877%2017.8325%2019.8741%2017.8985C19.7604%2017.9645%2019.6314%2017.9995%2019.5%2018H4.50001C4.36874%2017.9992%204.23997%2017.964%204.12659%2017.8978C4.0132%2017.8317%203.91916%2017.7369%203.85387%2017.6231C3.78858%2017.5092%203.75432%2017.3801%203.75452%2017.2489C3.75472%2017.1176%203.78937%2016.9887%203.85501%2016.875C4.47282%2015.8063%205.25001%2013.1072%205.25001%209.75Z'%20stroke='black'%20stroke-width='2'%20stroke-linecap='round'%20stroke-linejoin='round'/%3e%3c/g%3e%3cdefs%3e%3cclipPath%20id='clip0_4762_133'%3e%3crect%20width='24'%20height='24'%20fill='white'/%3e%3c/clipPath%3e%3c/defs%3e%3c/svg%3e)
'%3e%3cpath%20d='M24%200H0V24H24V0Z'%20fill='white'%20fill-opacity='0.01'/%3e%3cpath%20d='M12%2011C14.2091%2011%2016%209.20914%2016%207C16%204.79086%2014.2091%203%2012%203C9.79086%203%208%204.79086%208%207C8%209.20914%209.79086%2011%2012%2011Z'%20stroke='black'%20stroke-width='2'%20stroke-linecap='round'%20stroke-linejoin='round'/%3e%3cpath%20d='M4%2021V20.4857C4%2018.5655%204%2017.6055%204.38753%2016.872C4.72841%2016.2269%205.27235%2015.7024%205.94138%2015.3737C6.70196%2015%207.6976%2015%209.68889%2015H14.3111C16.3024%2015%2017.298%2015%2018.0586%2015.3737C18.7276%2015.7024%2019.2716%2016.2269%2019.6125%2016.872C20%2017.6055%2020%2018.5655%2020%2020.4857V21'%20stroke='black'%20stroke-width='2'%20stroke-linecap='round'%20stroke-linejoin='round'/%3e%3c/g%3e%3cdefs%3e%3cclipPath%20id='clip0_4762_139'%3e%3crect%20width='24'%20height='24'%20fill='white'/%3e%3c/clipPath%3e%3c/defs%3e%3c/svg%3e)

群晖导入磁盘大法 - 安装img
忘机山人
发布于329天前博客图片修整中,看不了可以先搜索公众号“忘机山人”看。
https://appstore.lazycat.cloud/#/shop/detail/chestnut.app.vdsm
虽然商店的群晖没虚拟机功能,但是如果你在微服上安装DSM虚拟机就可以用这个了,还是记录下来。
很多年之后再用群晖的虚拟机,发现越来越像云了,可能也有在云计算行业摸爬滚打了几年的原因吧,总喜欢一些比较稀奇古怪的玩法,在家里常常玩公有云那一套。
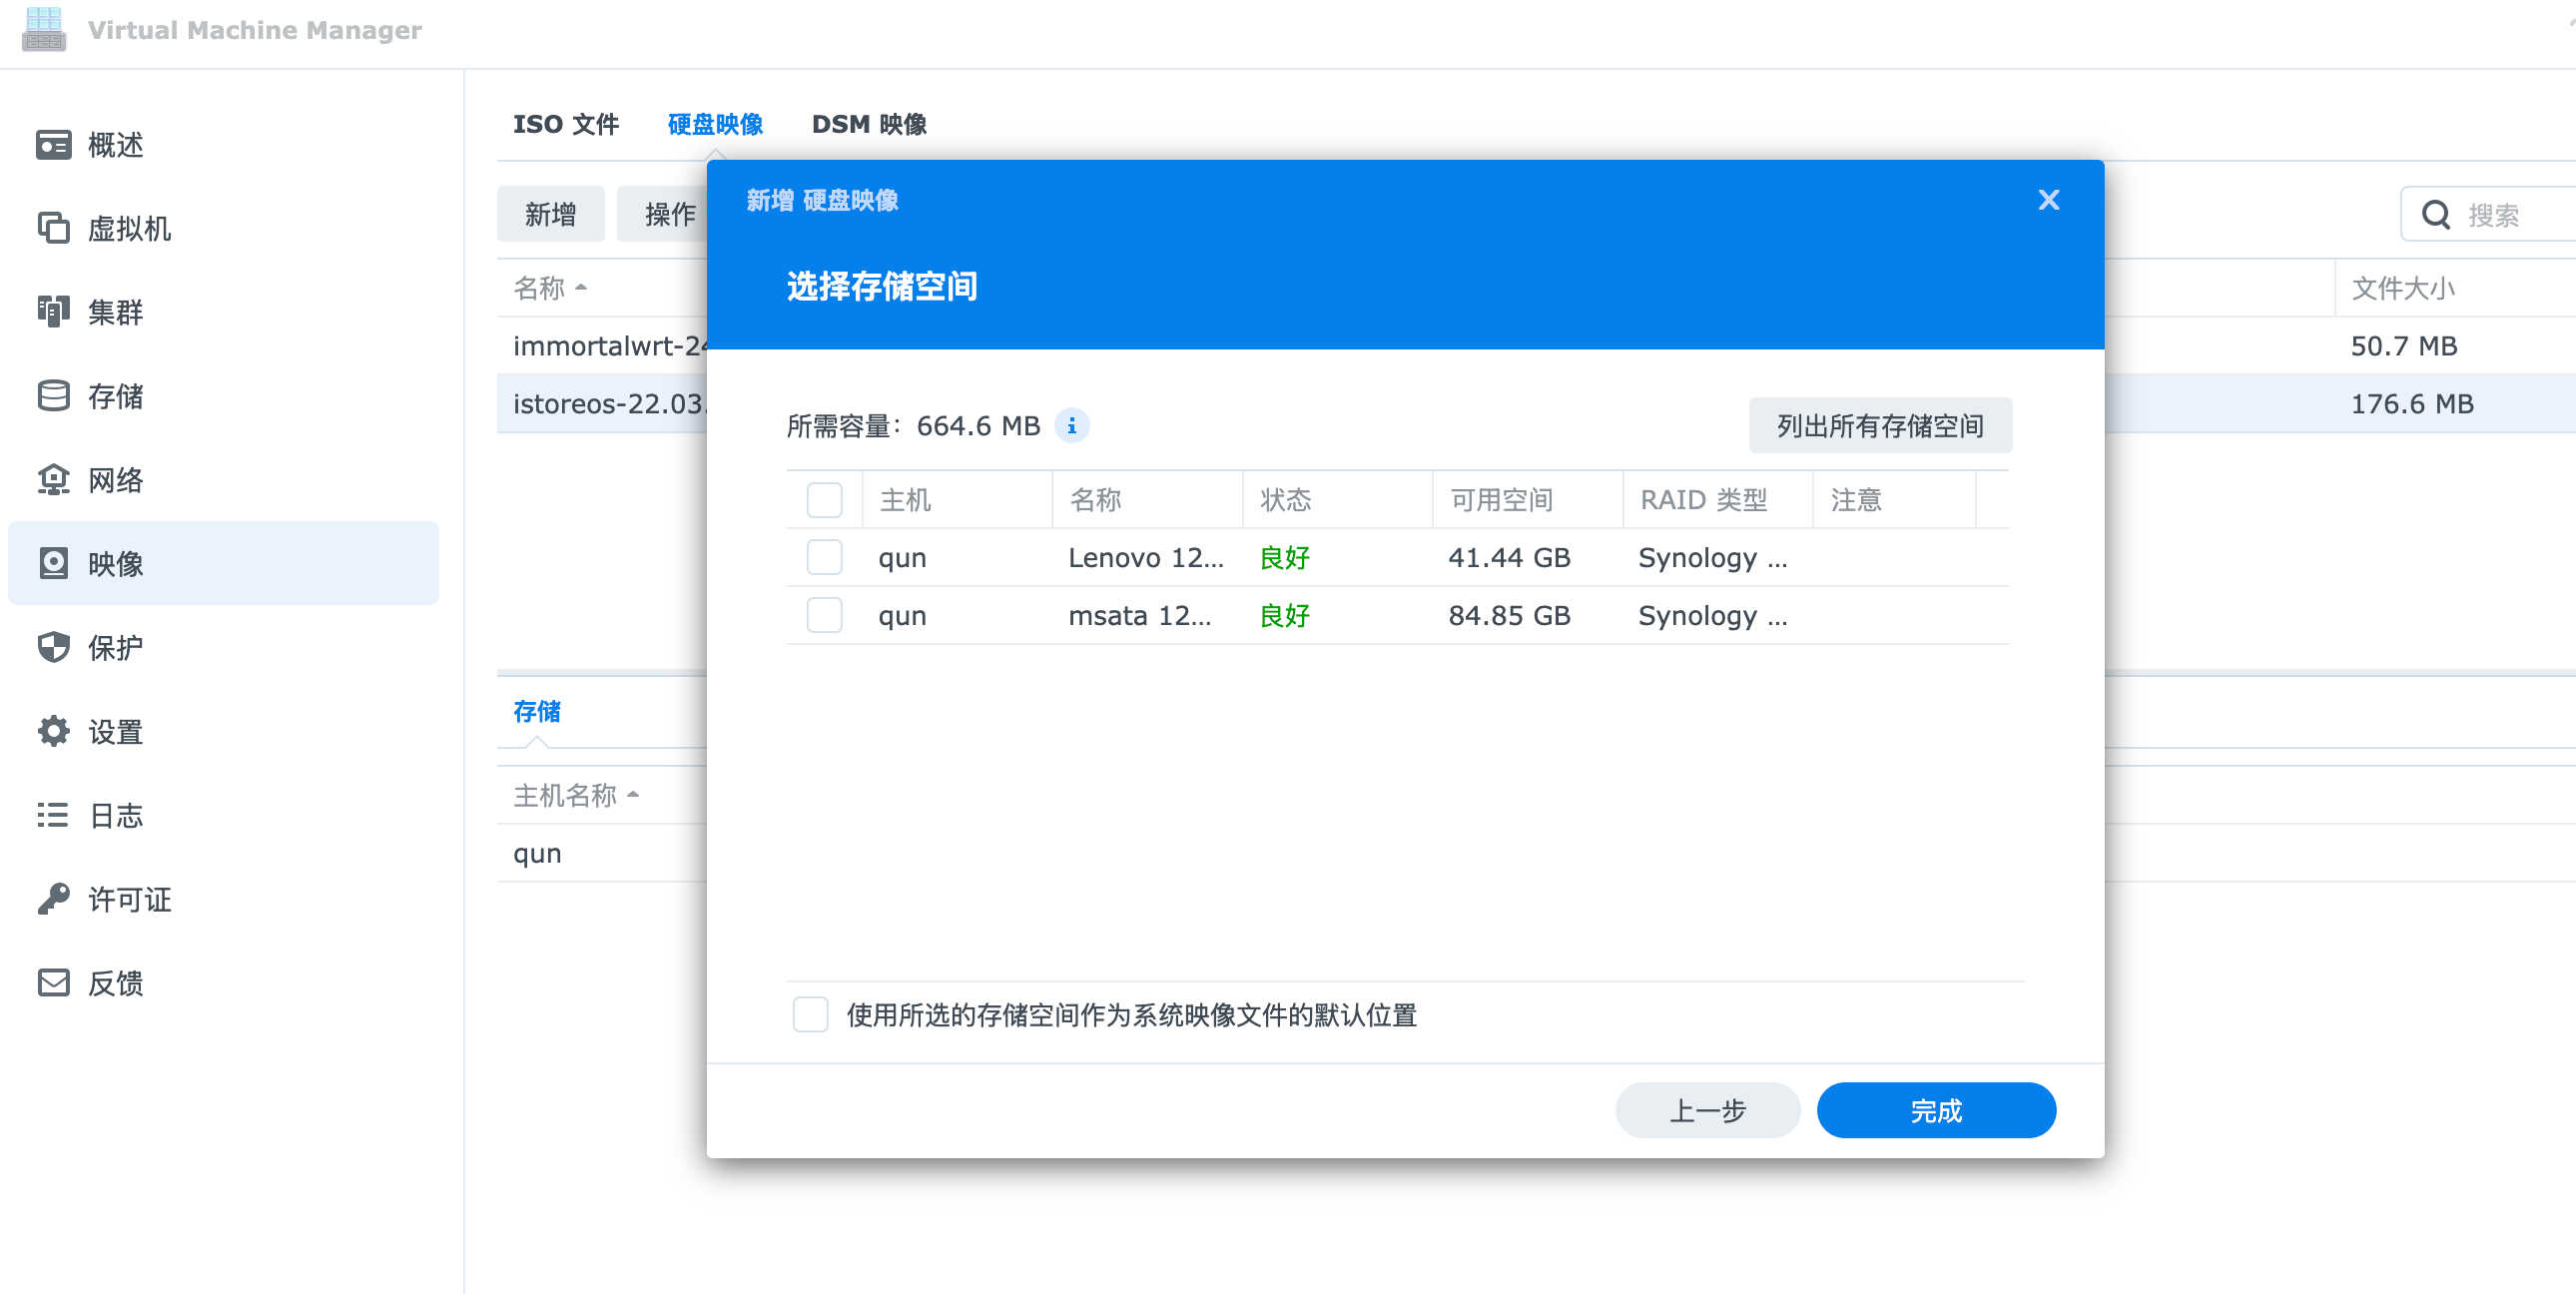
一、导入磁盘映像
得到 Img 之后,点击映像,然后点击导入磁盘映像,我这里有两块盘,随便选一个就好。
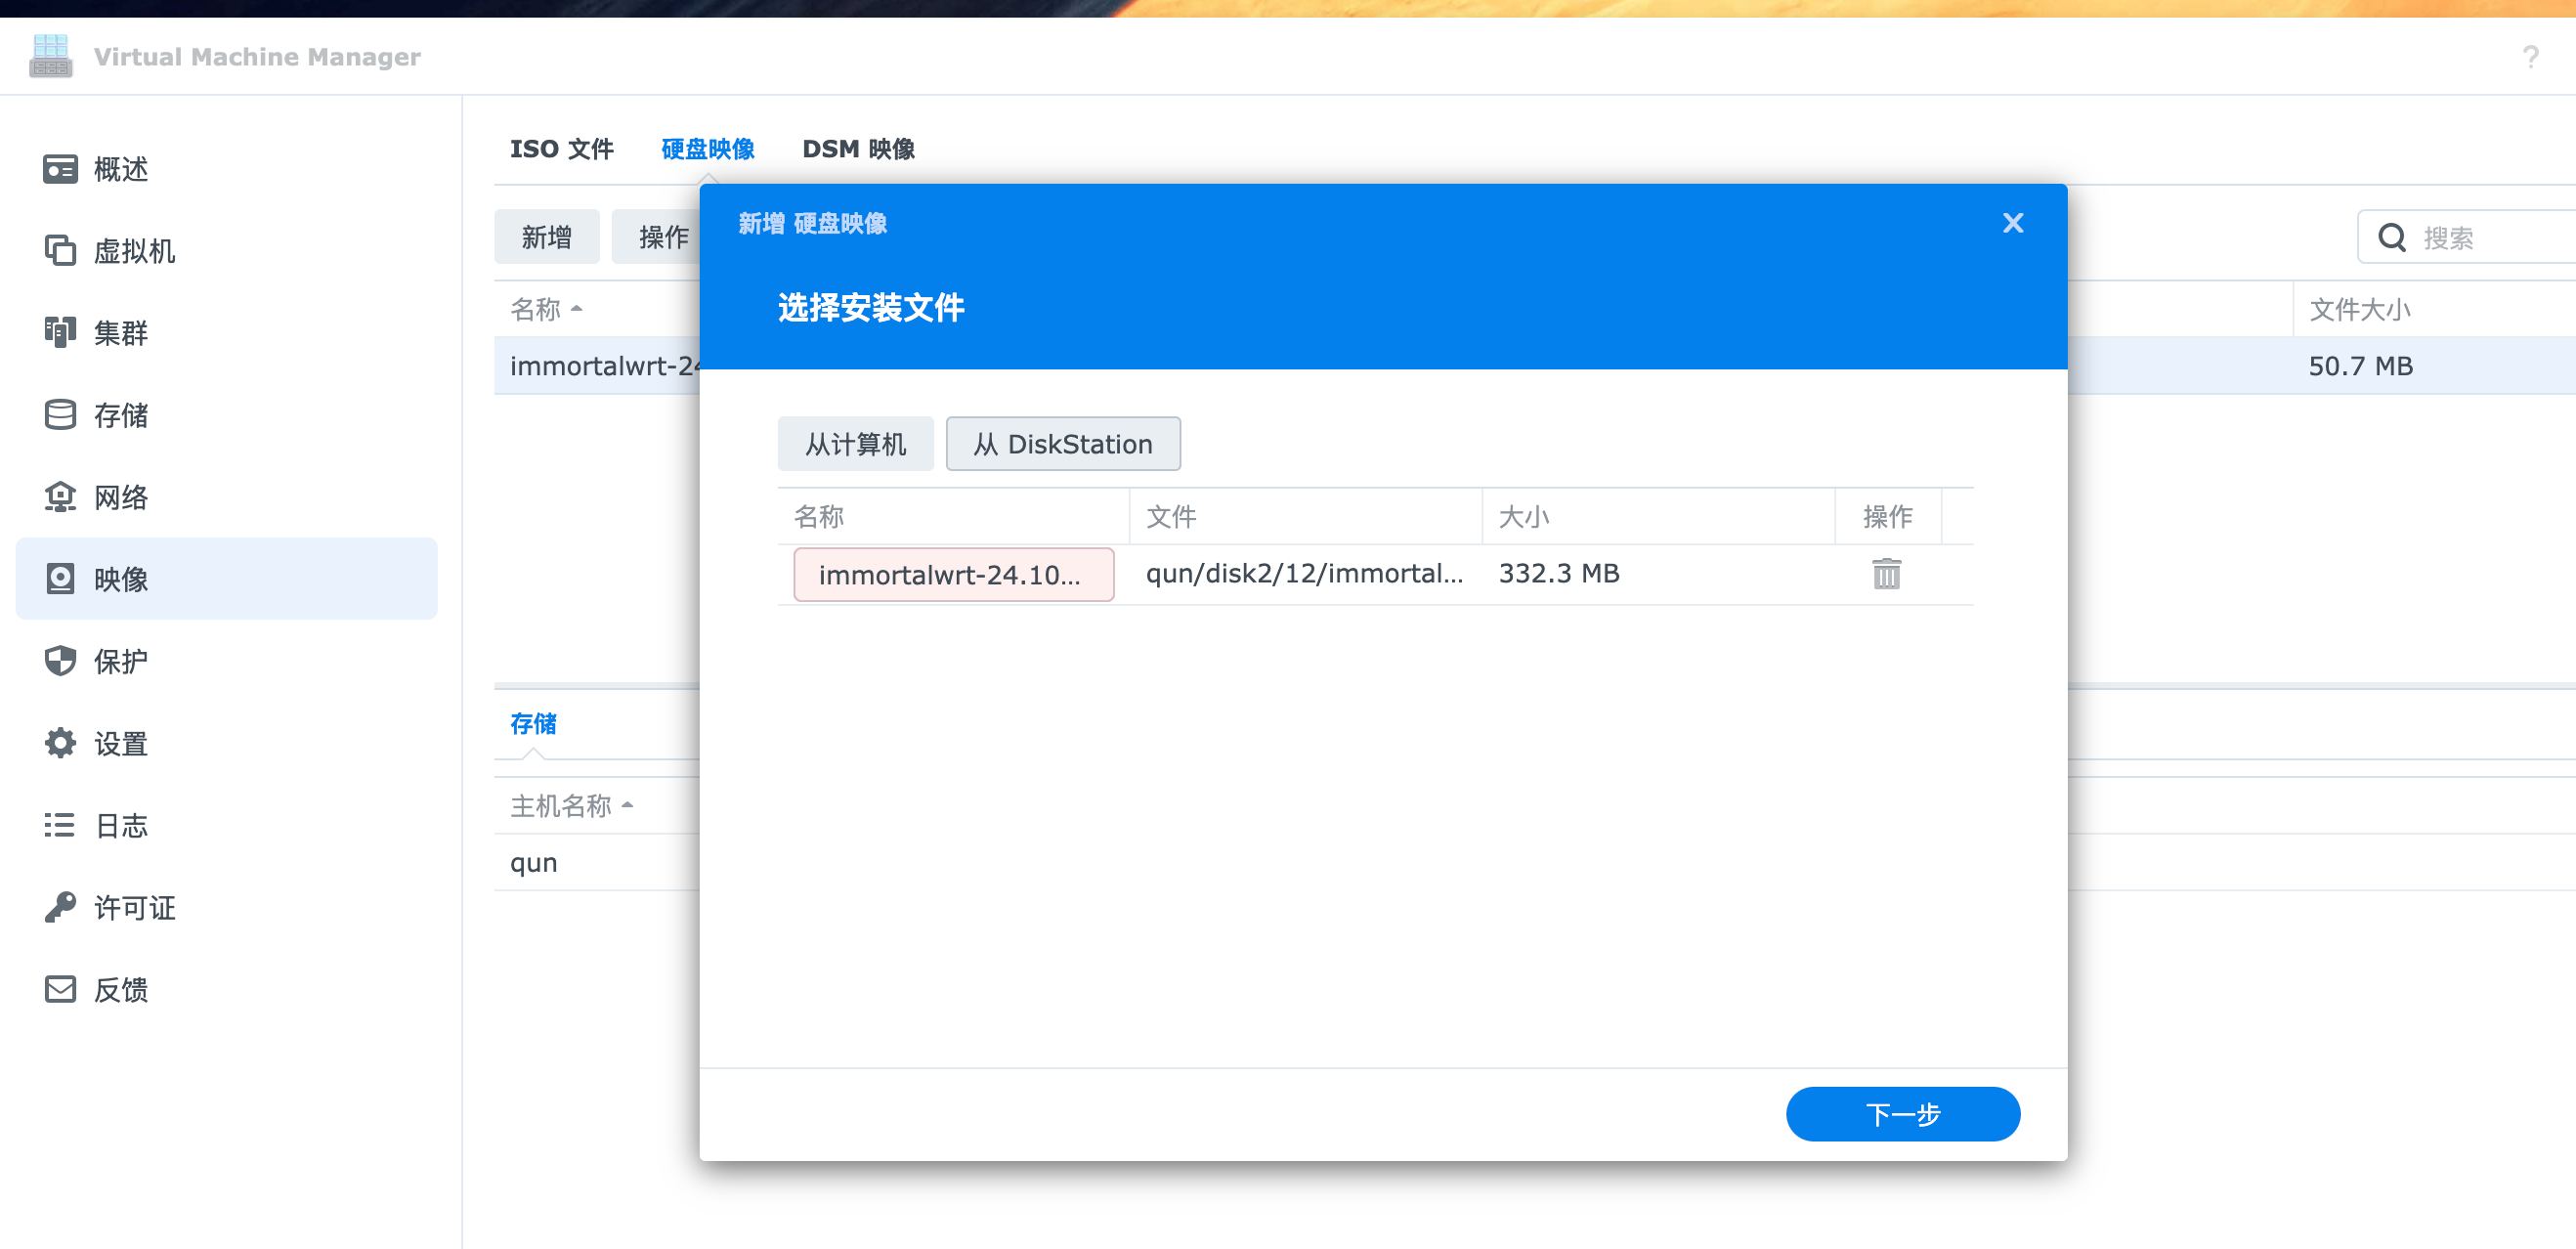
选中上传的 img 文件上传到磁盘映像。
然后可以观察到群晖根据这个 img 正在创建卷文件。
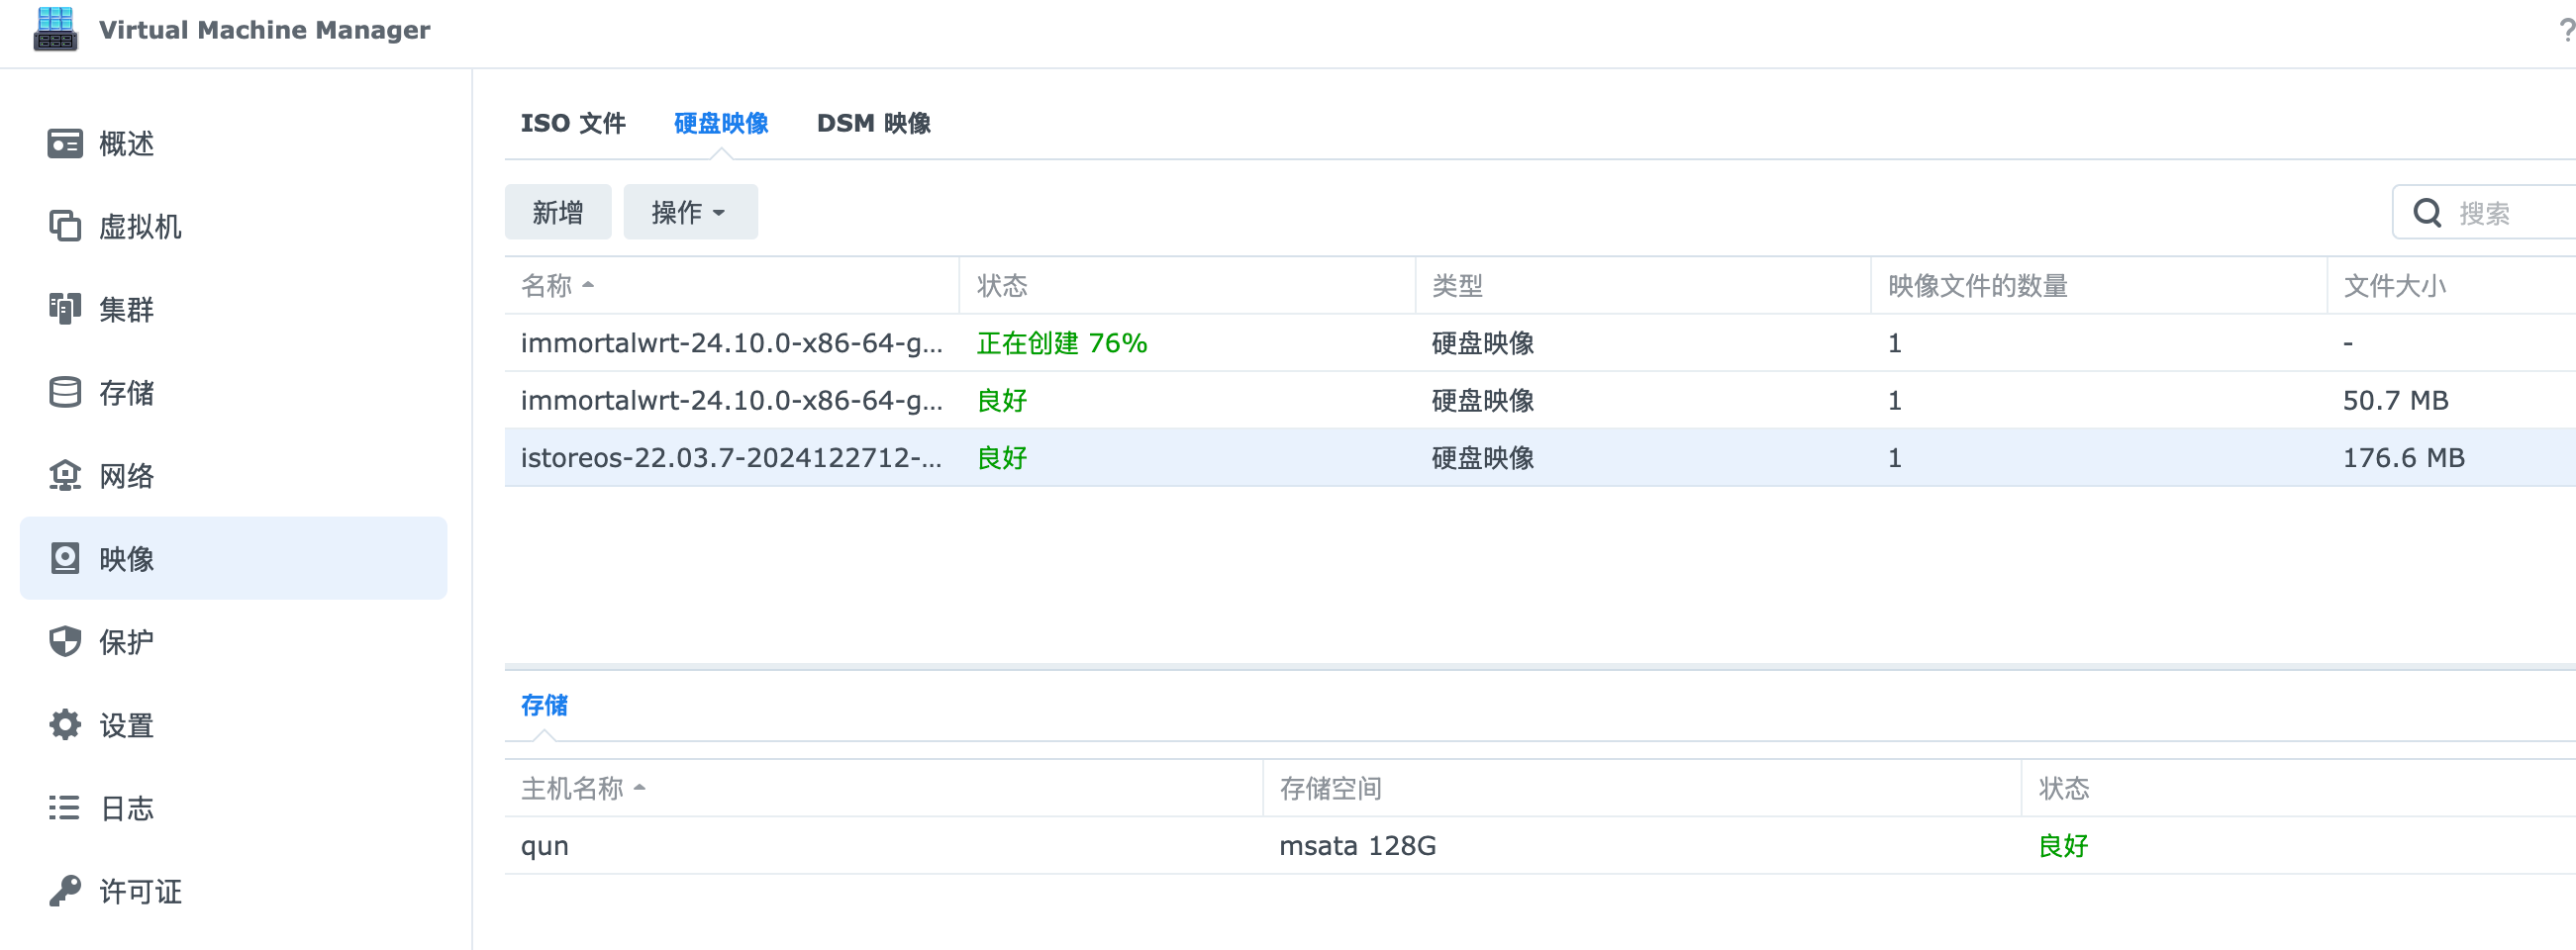
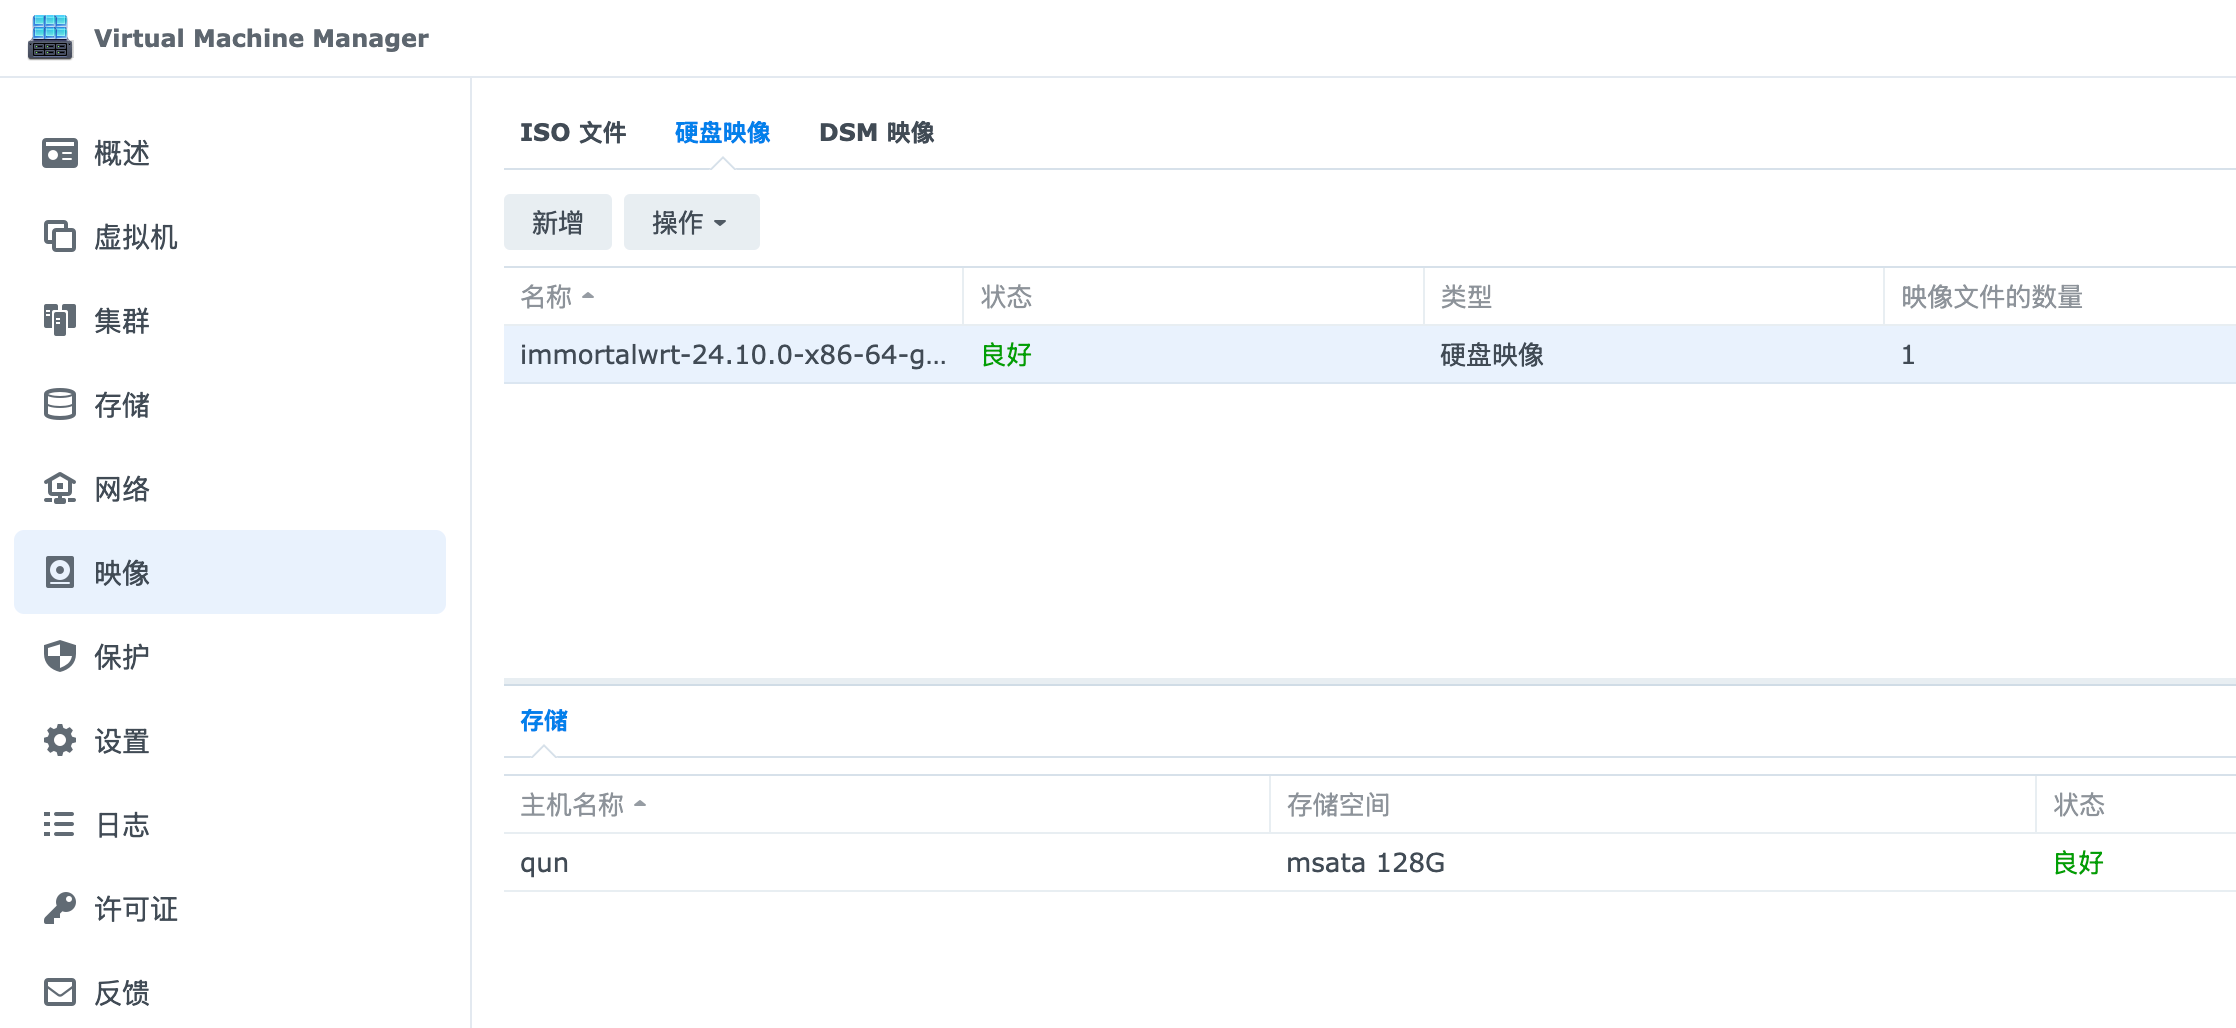
这个是创建好的卷。
二、导入虚拟机并启动
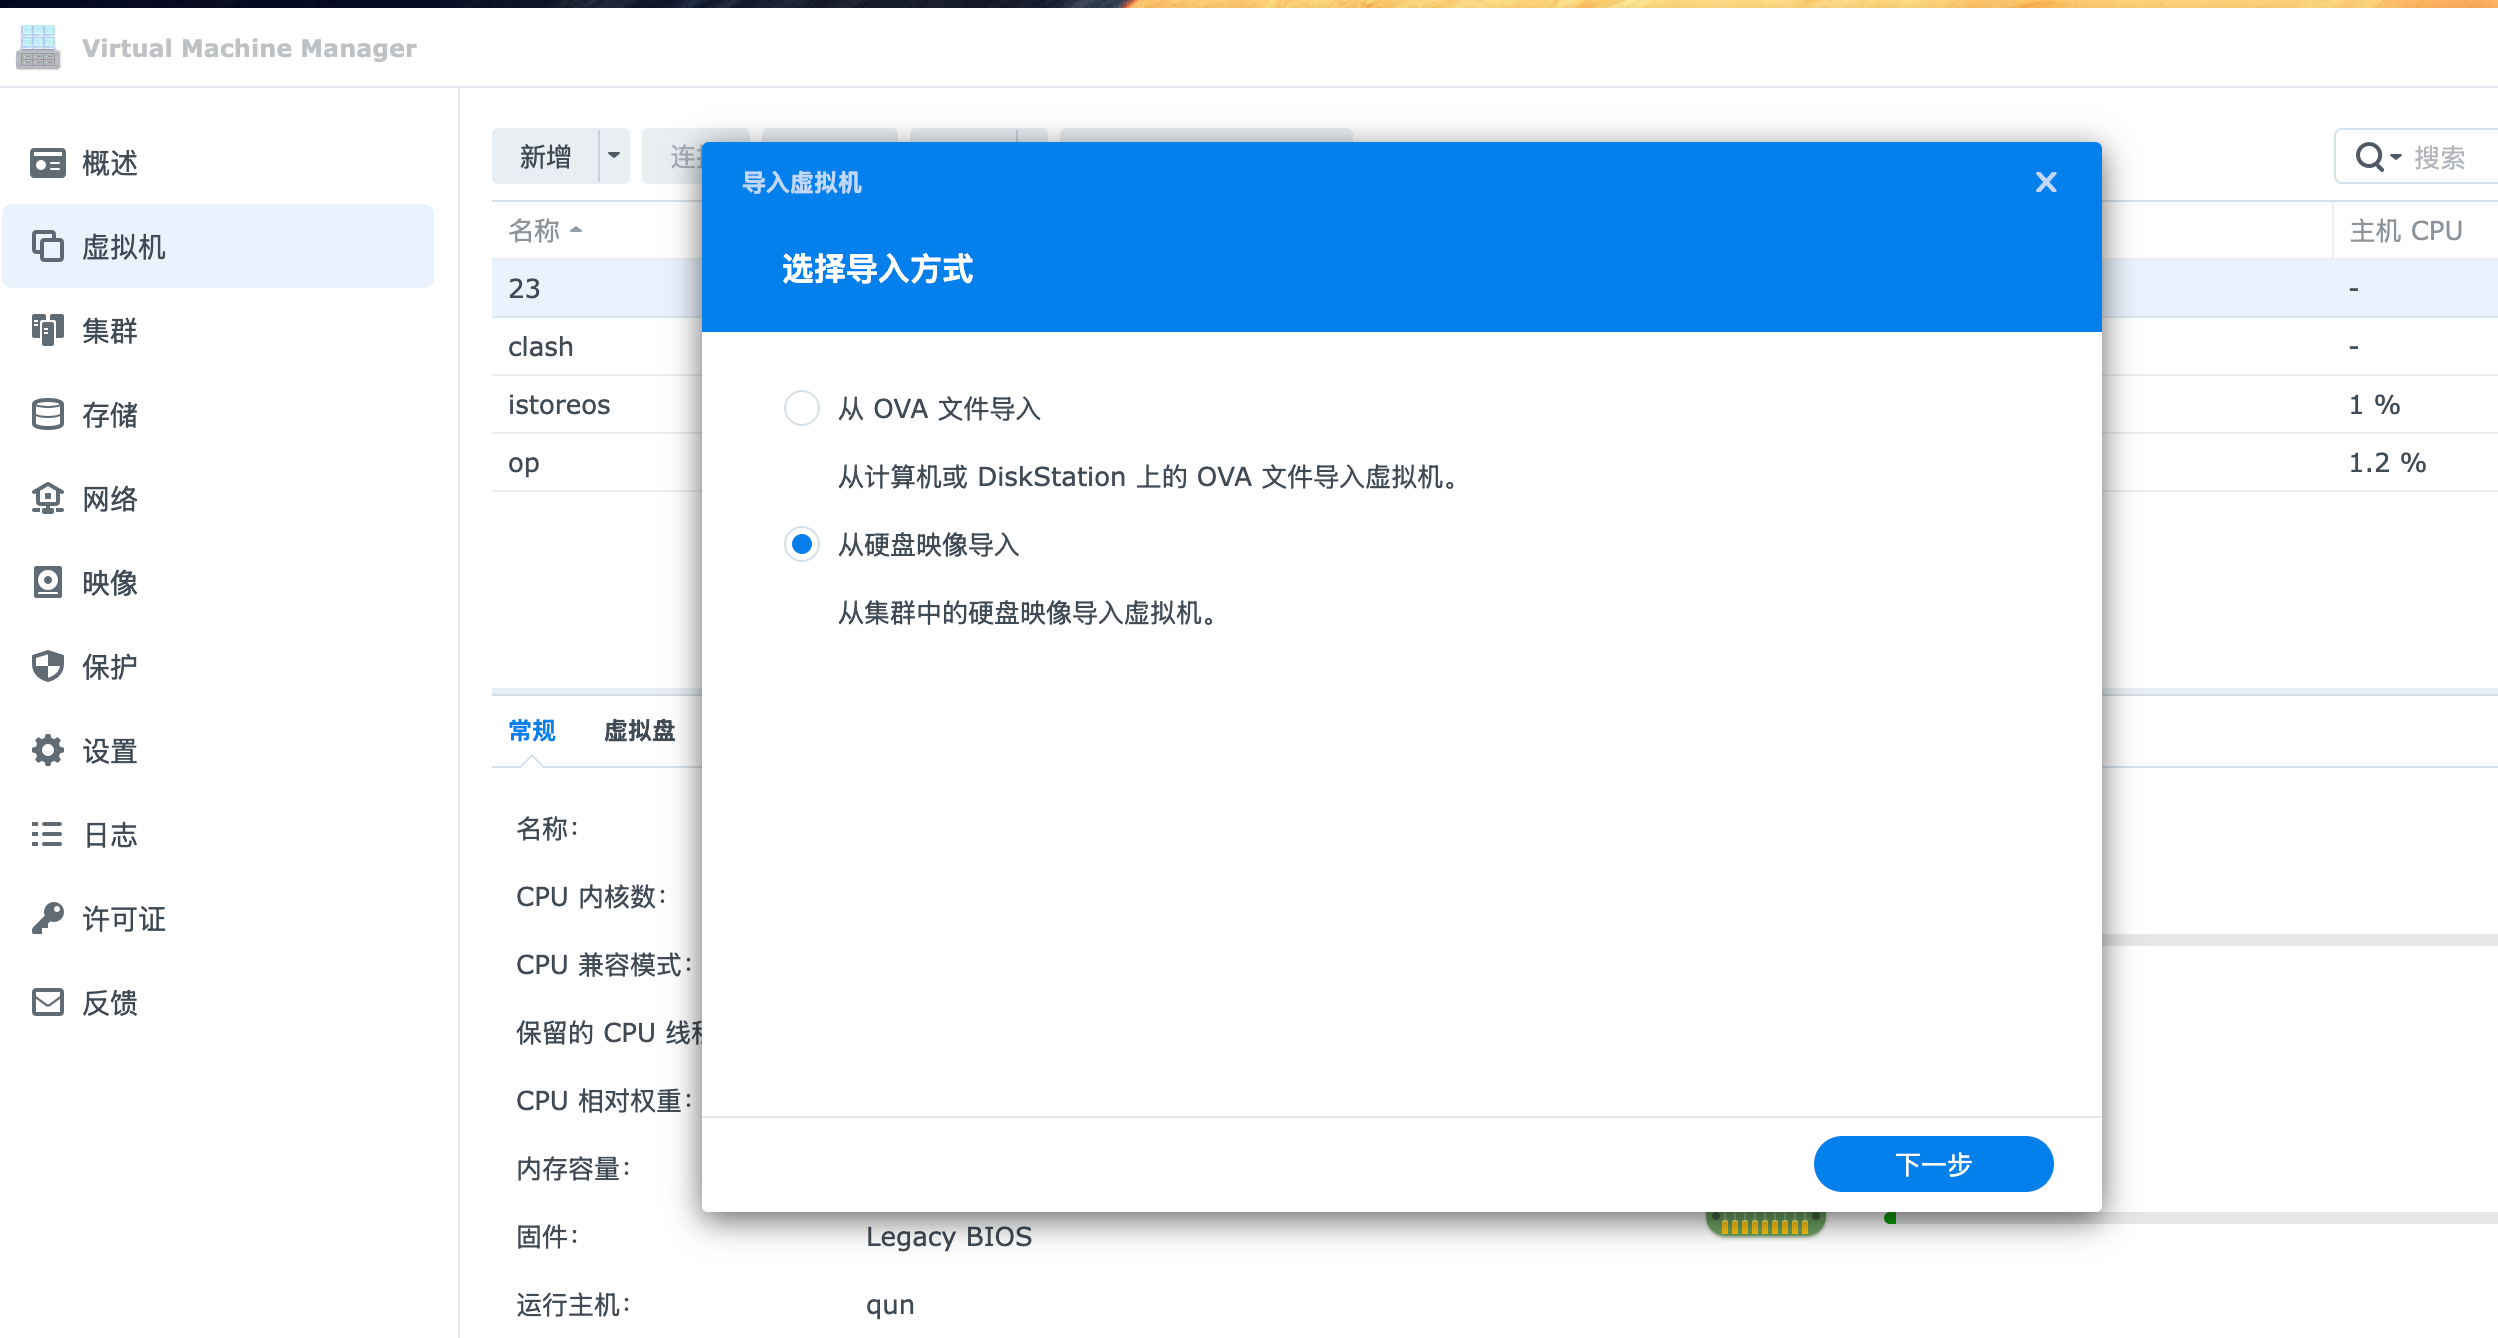
下面开始启动虚拟机,新增附近有一个三角箭头点击,有个导入的选项。(藏的挺深)
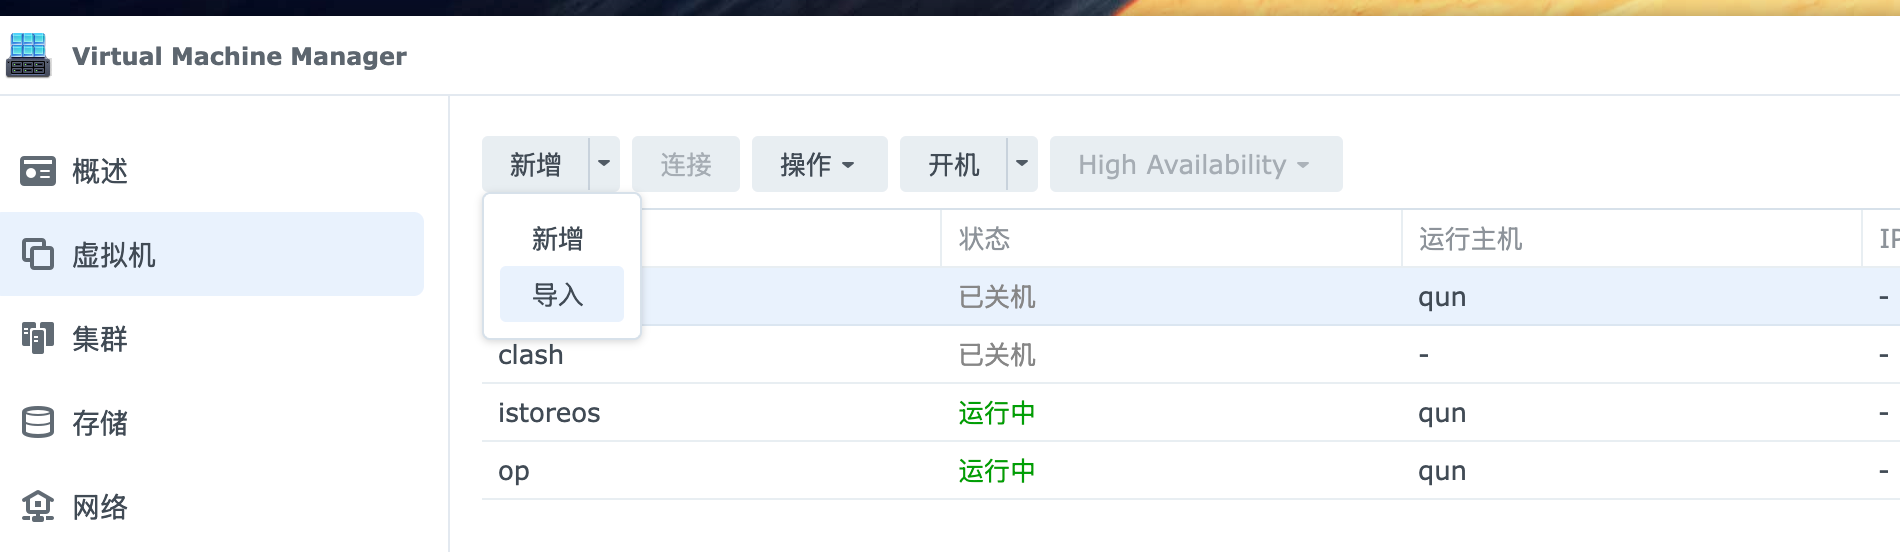
可以导入 OVA,也可以导入上面的磁盘映像。
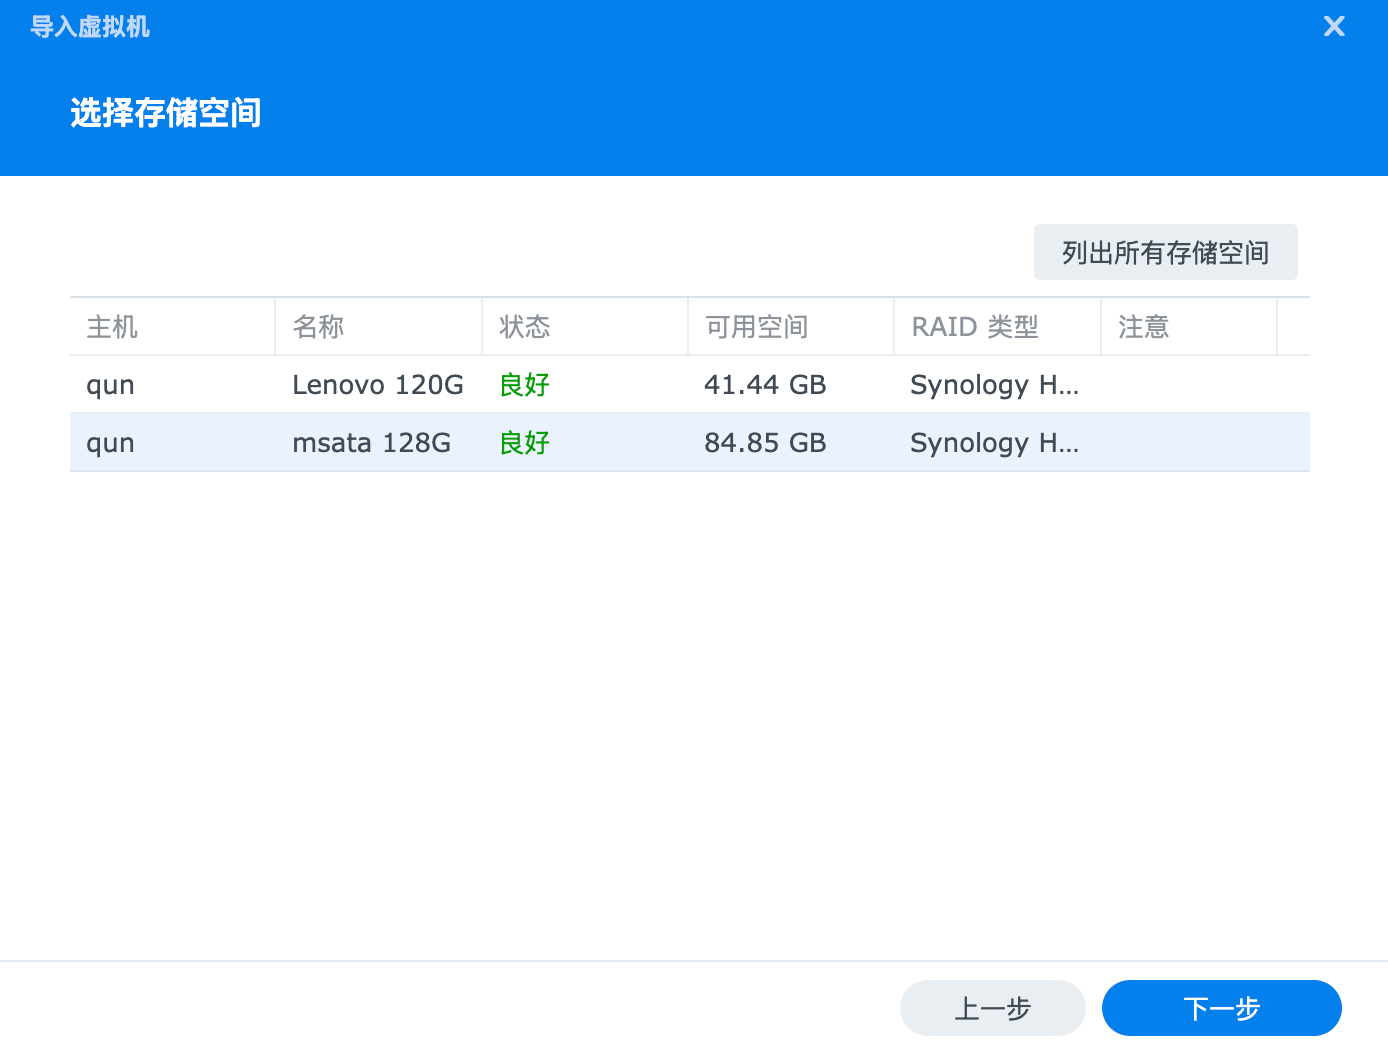
同样也是选择磁盘。
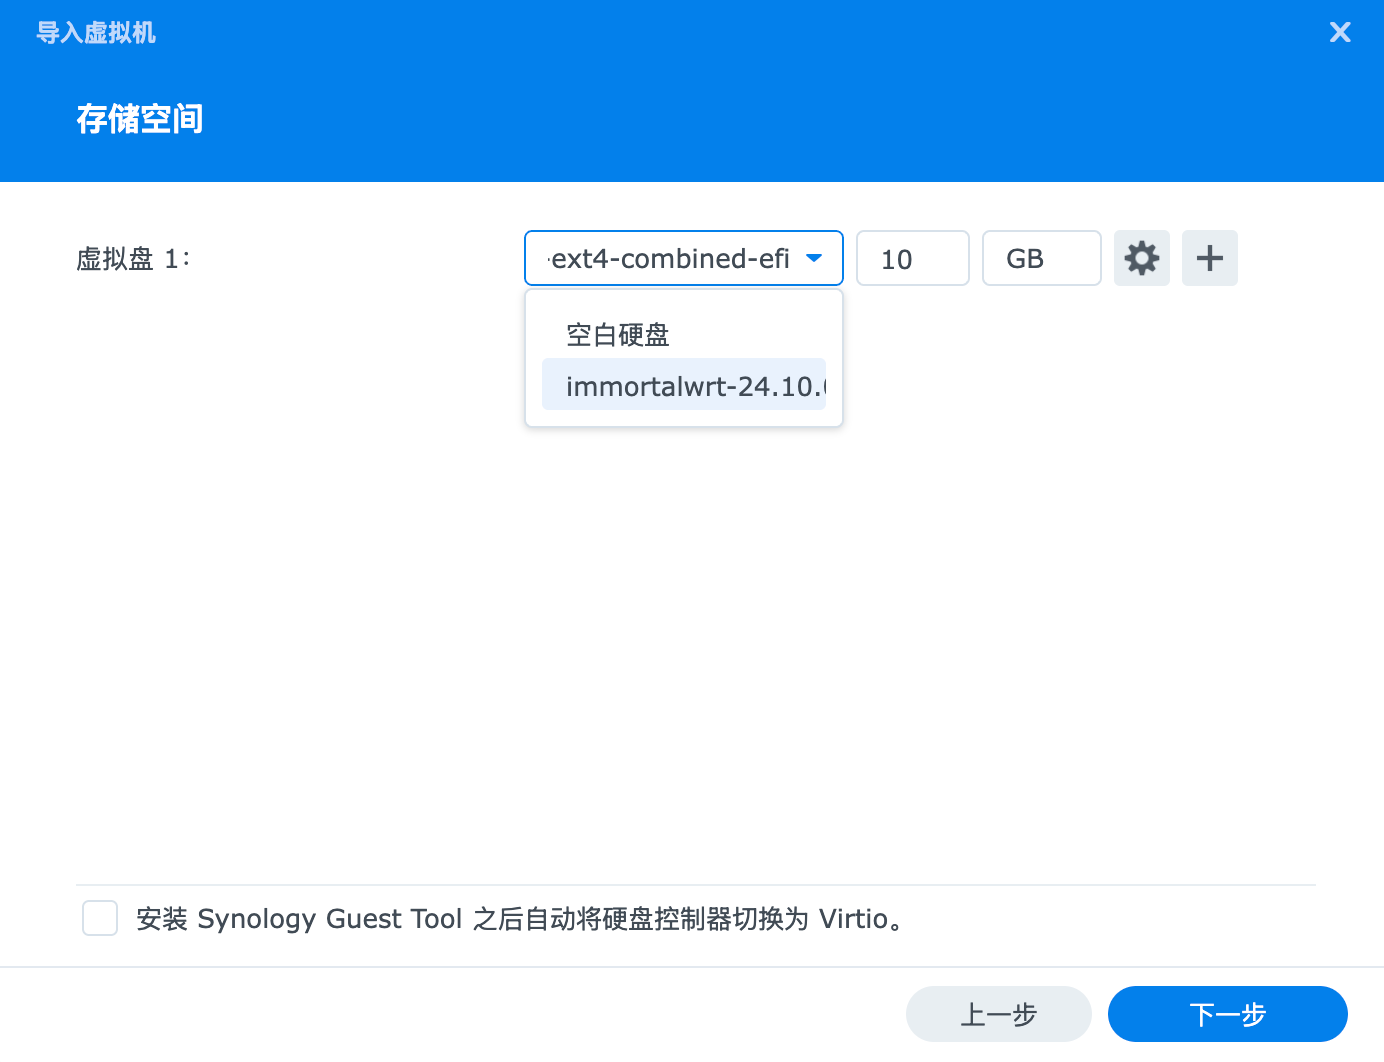
唯一不同的是,在虚拟磁盘这里我们可以选择刚刚创建的硬盘映像,然后后面下一步就可以了,不再需要 ISO 啥的。
三、总结
其实吧,在公有云这算基础操作,在群晖这藏的这么深。随便玩玩,差不多该有的都有了。
评论
0暂无评论